21 Halloween Charcuterie Board Ideas That Steal the Party
Every Halloween party has one table everyone gathers around before anyone even says hello — and it’s rarely the drinks table. It’s the food. Specifically, it’s whatever spread is doing the most visual work the second people walk in the door.
A charcuterie board earns that spot better than almost anything else you could put out, because it’s the rare party food that works as both dinner and decoration. Guests graze on it for hours, it photographs well before a single piece is touched, and it gives you a reason to use words like “coffin bowl” and “graveyard dirt” in a sentence without anyone blinking.
The catch is that most Halloween charcuterie boards you see online are really just a list of spooky snacks pushed together on a platter, with no real thought given to how they actually sit next to each other. This list fixes that. Twenty-one ideas, organized so you can build one cohesive board instead of twenty-one separate ones fighting for space.
Table of Contents
1. Mummy-Wrapped Brie as the Centerpiece
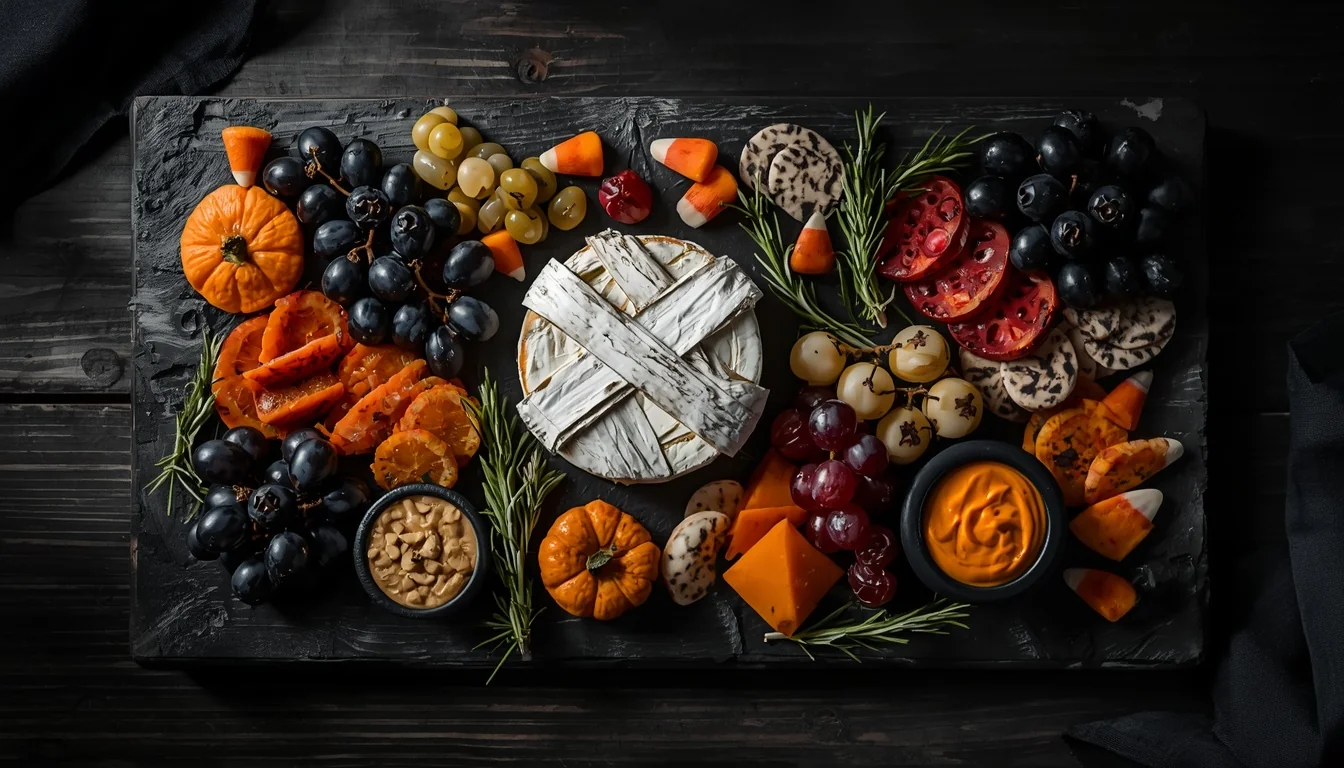
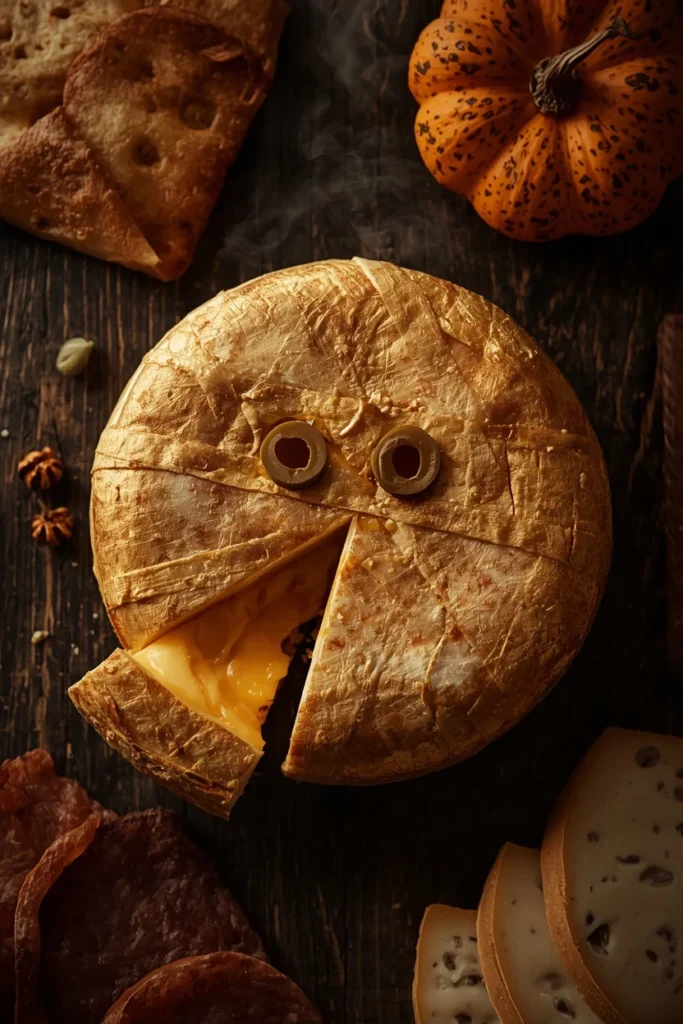
A whole wheel of brie wrapped in thin strips of puff pastry or phyllo dough, baked until golden, then finished with two small olive slices for eyes, is the single most reliable centerpiece in Halloween charcuterie because it works as both the visual anchor and the first thing that runs out. Place it dead center or slightly off-center toward the top of the board, since everything else you add should visually radiate outward from it. The warm, oozing center against the crisp mummy wrap gives the board real temperature contrast, not just color contrast, which is part of why it photographs so well. Bake it close to serving time so the wrap stays golden and the inside stays soft when guests cut into it. This single item can anchor an entire board even if you keep everything else around it simple.
2. Jack Skellington Brie Wheel
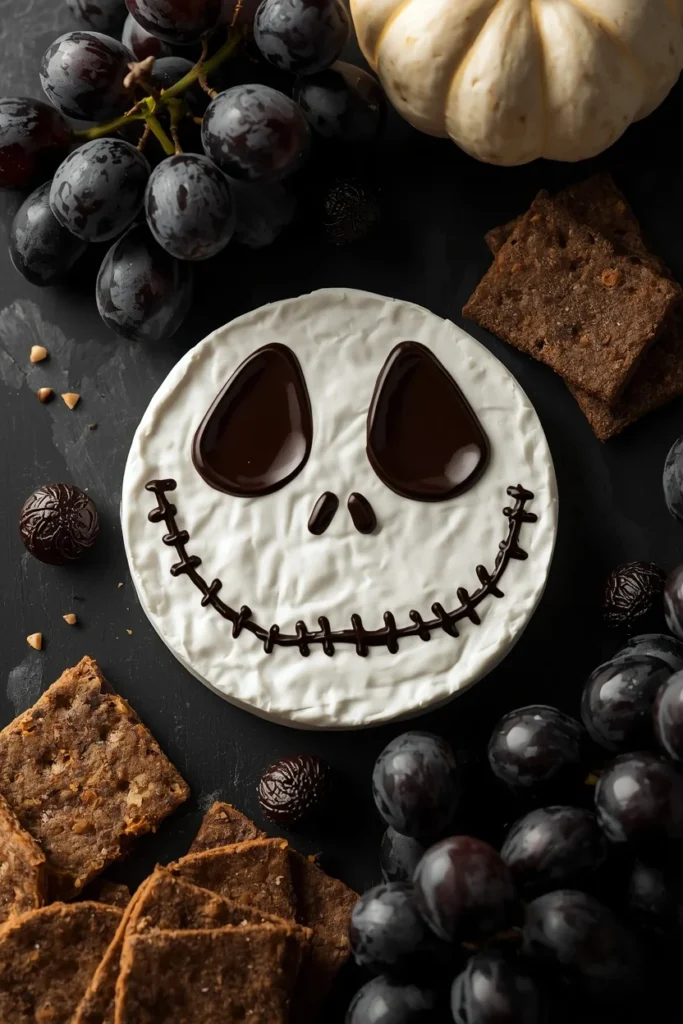
Using a thin edible marker or a small piping bag of melted dark chocolate, draw the Jack Skellington face directly onto a plain white-rind brie or camembert wheel for a centerpiece that needs zero baking and takes under five minutes. Keep the linework simple — two almond-shaped eyes, a curved brow line, and the signature stitched mouth — since a cleaner design reads better from across a party than an overly detailed one. This idea works especially well for boards leaning more “fun spooky” than “gory spooky,” making it a strong pick for family or kid-inclusive parties. Surround it with black grapes and dark crackers so the pale cheese stays the clear focal point against a darker backdrop. Because it’s undecorated cheese underneath the design, leftover slices are still just totally normal brie the next day.
3. Olive Spiders on Cream Cheese Rounds
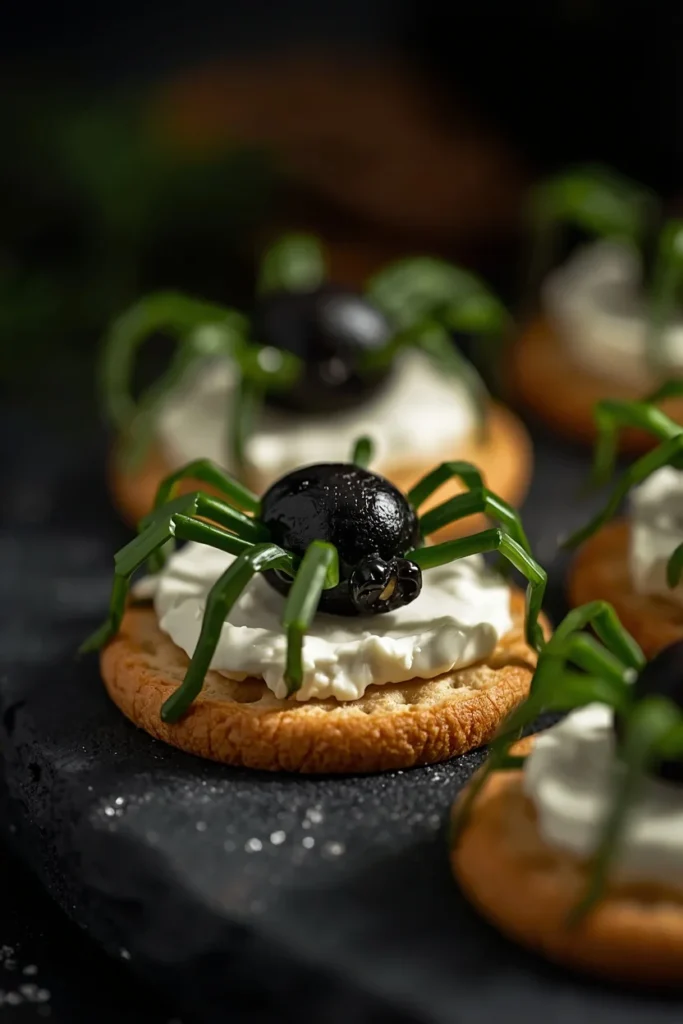
Cut small rounds of soft cream cheese or goat cheese onto crackers, then use whole small black olives as the spider body with thin strips of scallion or chive as the legs, fanned out symmetrically on both sides. These work best scattered across the board in clusters of three rather than lined up in a row, since real spiders don’t move in formation and the randomness reads more convincingly creepy. Keep the legs thin and slightly curved rather than straight, using a paring knife for clean scallion strips. This is one of the easiest make-ahead items on the list, since the spiders hold their shape for hours once assembled and refrigerated. Tuck a few into the gaps between larger items, since they’re small enough to fill visual dead space without competing with bigger centerpieces.
4. Coffin-Shaped Bowls for Dips and Spreads
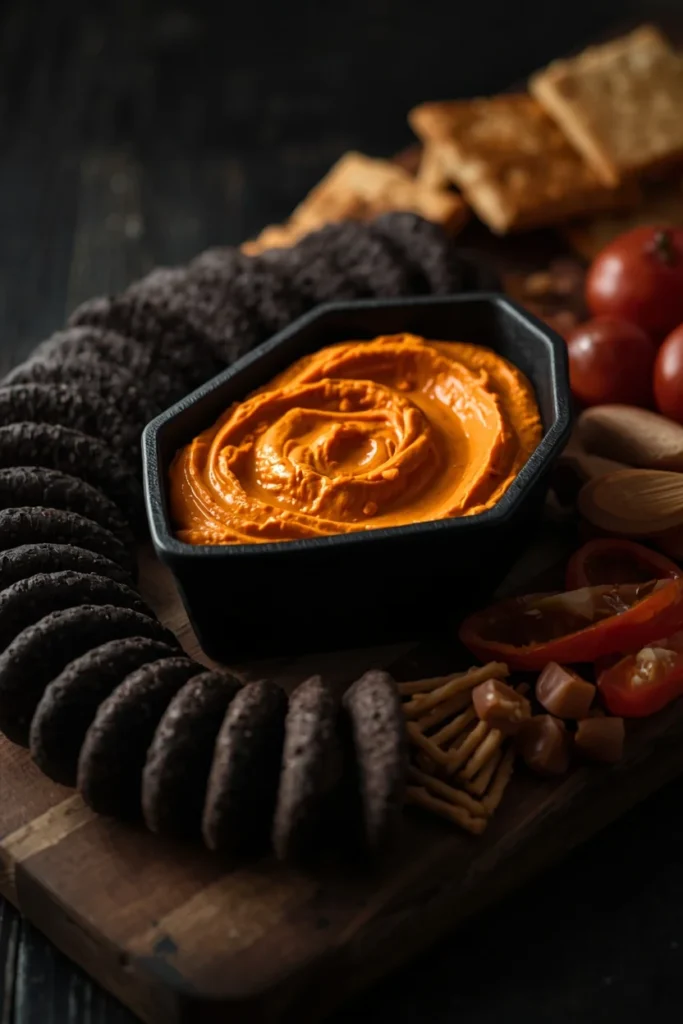
Small rectangular bowls trimmed at one end into a coffin silhouette — either purpose-bought or improvised using a rectangular dish with the corners visually framed by dark crackers — instantly upgrade any dip from “bowl of hummus” to “on-theme centerpiece piece.” Fill them with contrasting colors, like a bright orange hummus or a deep purple beet dip, so the coffin shape stays legible even from a few feet away. Two or three coffin bowls placed at different points on the board, rather than clustered together, help balance the composition and give your eye multiple stopping points as it travels across the spread. This idea solves a real styling problem, since dips are usually the least visually interesting part of a charcuterie board and this makes them a feature instead. Label each one with a small kraft tag for an extra layer of theming if you want to lean further into the bit.
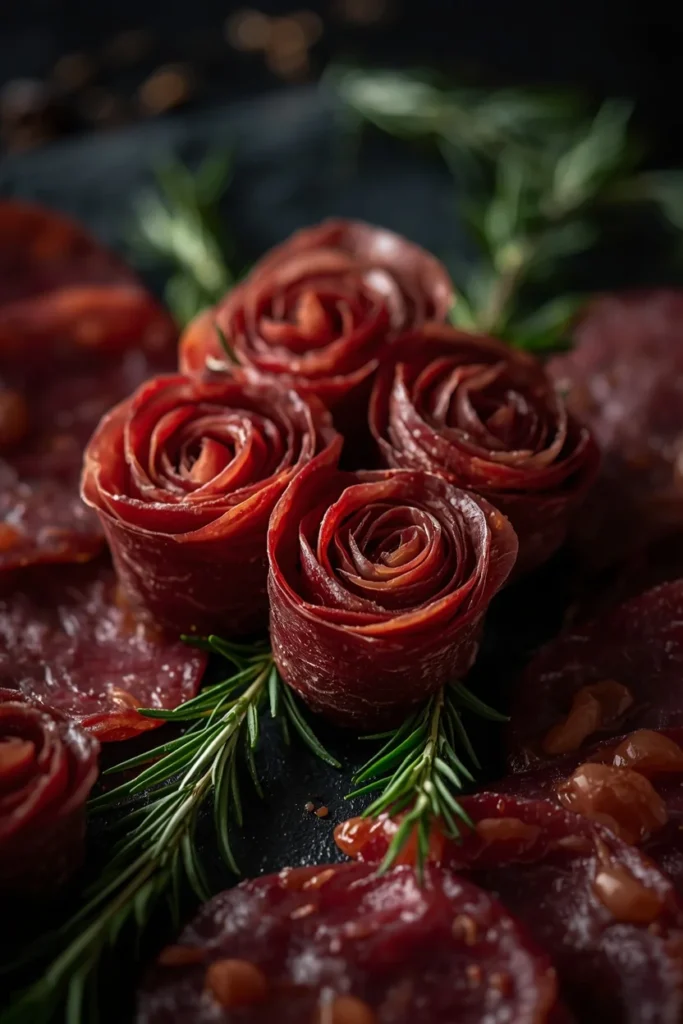
5. Salami Roses Styled as Dark Blooms
Rolling thin salami or pepperoni slices around a small glass or the handle of a wooden spoon, then releasing them into a rose shape, gives the board a genuinely elegant element among all the playful spooky pieces, and the deep red-brown color reads as “gothic bloom” without any extra styling. Cluster three or four salami roses together in one section of the board, almost like a small bouquet, rather than spacing them out individually, since the visual impact comes from repetition. This idea also solves a real assembly problem, since rolled meat holds its shape far better than flat slices and won’t shift when the board gets moved or refilled. Pair the cluster with a few sprigs of fresh rosemary tucked between the roses to complete the “dark bouquet” look. This is one of the few ideas on this list that reads sophisticated enough for an adults-only Halloween gathering.
6. Graveyard Dirt Dip in a Small Cauldron
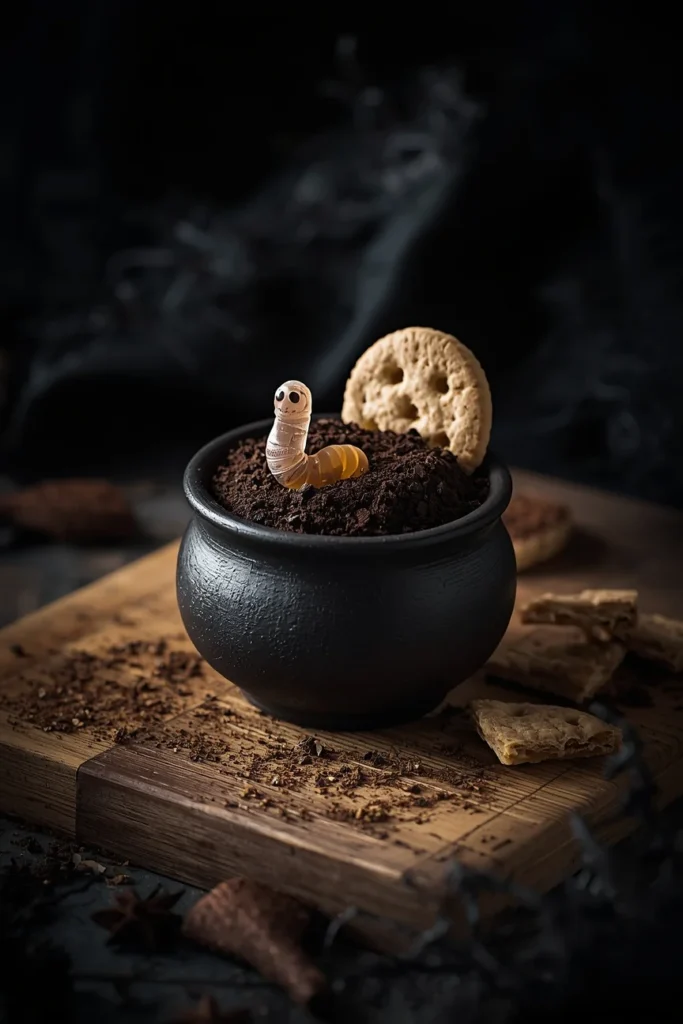
Crushed chocolate cookies pressed on top of a chocolate pudding or dip, served in a small black cauldron-shaped bowl, gives the sweet corner of your board its own clear identity instead of blending into the savory side. Add one or two gummy worms peeking out of the “dirt” and a small broken cracker propped in at an angle like a tombstone for the full graveyard effect. Keep this item toward one end of the board rather than the center, since it’s rich and sweet and works better as a discovery moment than a competing centerpiece. The cauldron shape alone does most of the theming work here, meaning the recipe itself can stay genuinely simple — pudding, crushed cookies, done. This is consistently one of the most photographed single items on any Halloween charcuterie board because of how literally it delivers on the “graveyard” concept.
7. Eyeball Grapes and Mozzarella
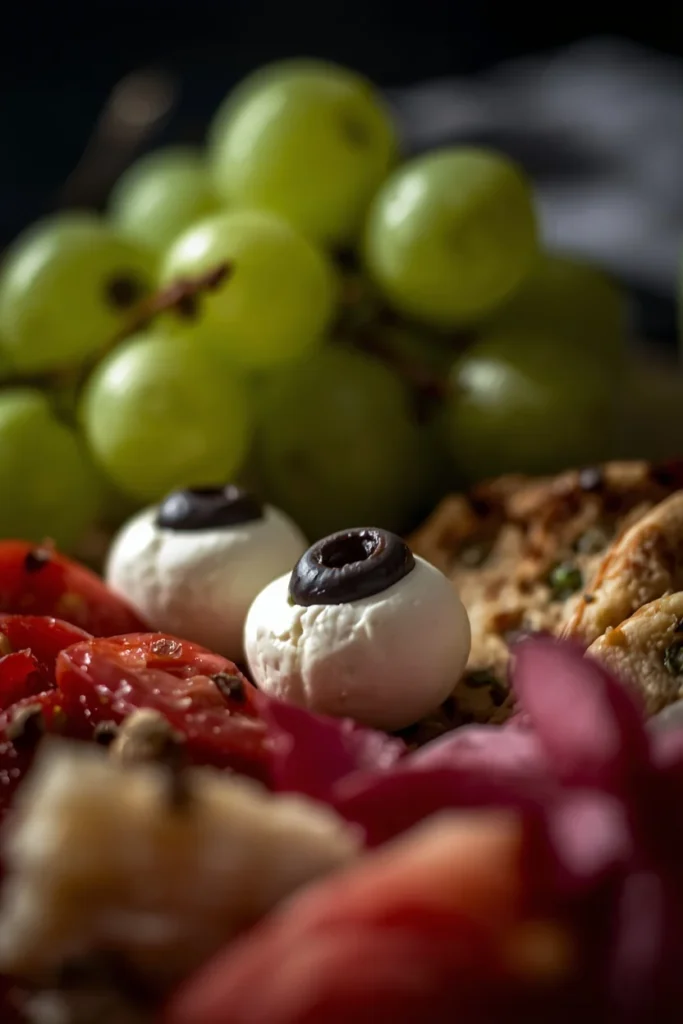
Peeled green grapes, or small mozzarella balls with a thin slice of black olive pressed into the center, both work as convincing “eyeball” stand-ins scattered loosely across open areas of the board. Mix the two together in the same cluster for varied texture — the grape’s slight give against the mozzarella’s firmness reads as more unsettling when guests bite in without knowing which is which. Scatter these in small groups of five or six rather than one long row, tucked into gaps near other items so they read as an accent rather than a standalone dish. This idea is genuinely one of the cheapest on the list, since grapes and small mozzarella balls are both inexpensive and require almost no prep beyond the olive garnish. It’s also a strong option if you want at least one item that gets an audible reaction from guests before anyone actually tastes it.
8. Witch Finger Carrot and Cheese Sticks
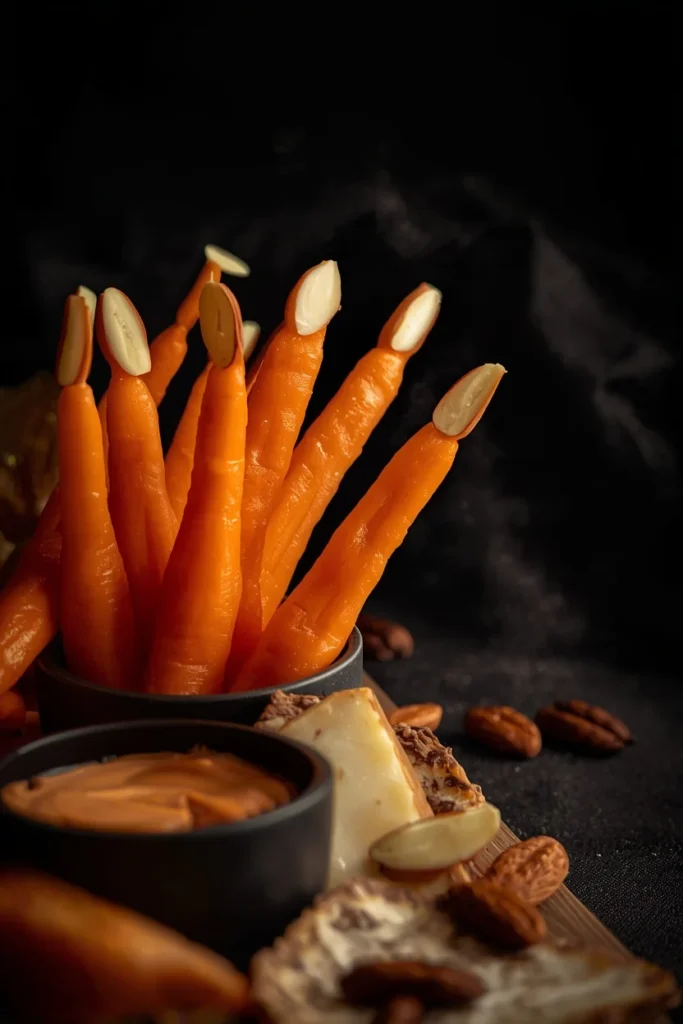
Baby carrots or cheese sticks trimmed at one end to a point, with a sliced almond pressed in as the “fingernail” and a shallow knuckle line cut with a paring knife, make one of the most instantly recognizable spooky shapes on any Halloween food table. Arrange them fanned out from a single point, like fingers reaching out of the board, rather than in a neat parallel row, which sells the “reaching hand” illusion far better. This idea gives your board a genuine vegetable option that still fits the theme, which matters if you’re balancing a spread that otherwise leans heavy on meat and cheese. Keep a small dish of hummus or ranch nearby specifically for dipping the “fingers,” since it reinforces the bit every time someone reaches for one. This is consistently a favorite with kids at mixed-age Halloween parties, since it’s visually dramatic but not remotely gory in flavor.
9. Candy Corn Color-Block Clusters
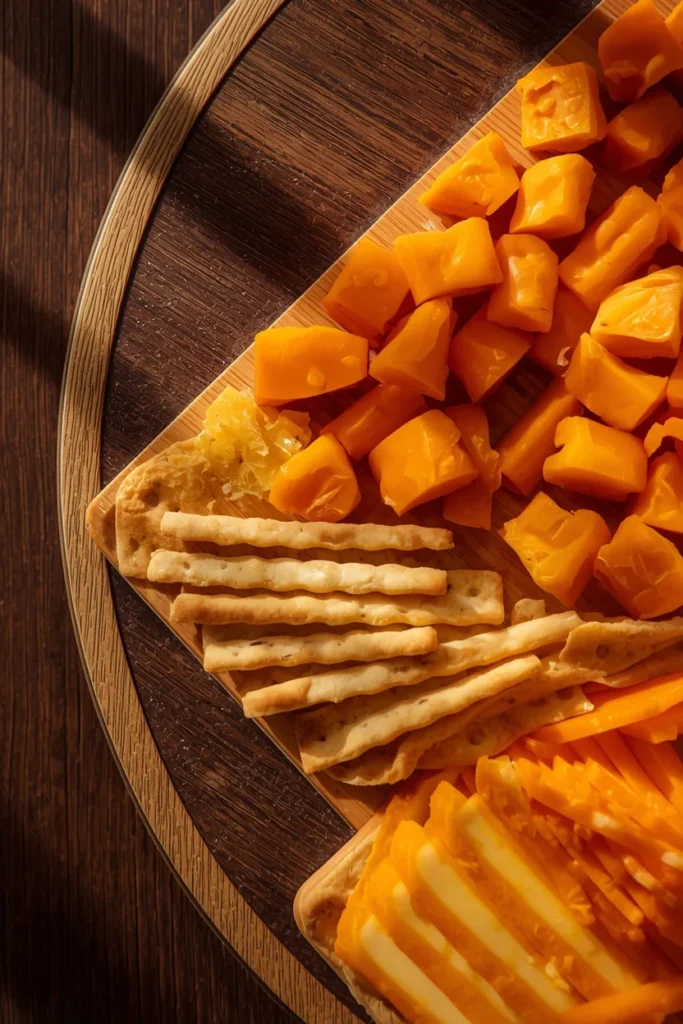
Rather than scattering actual candy corn randomly, use it to color-block a small triangular section of the board — a base layer of orange cheese cubes or cheddar, a middle layer of pale crackers or white cheese, and a top accent of yellow bell pepper strips — echoing candy corn’s color stripes without needing the candy itself. Add a small handful of real candy corn at the tip of the triangle to make the color reference obvious. This idea is one of the strongest “GEO-friendly” additions on the list because it visually explains itself, meaning even a quick glance at a photo communicates the concept instantly. It also gives you a clean, graphic block of color to balance out the busier, more textured items elsewhere on the board. Keep the triangle shape loose and slightly imperfect rather than perfectly geometric, since a charcuterie board reads more natural with soft edges than hard lines.
10. Bat-Shaped Salami and Cracker Cutouts
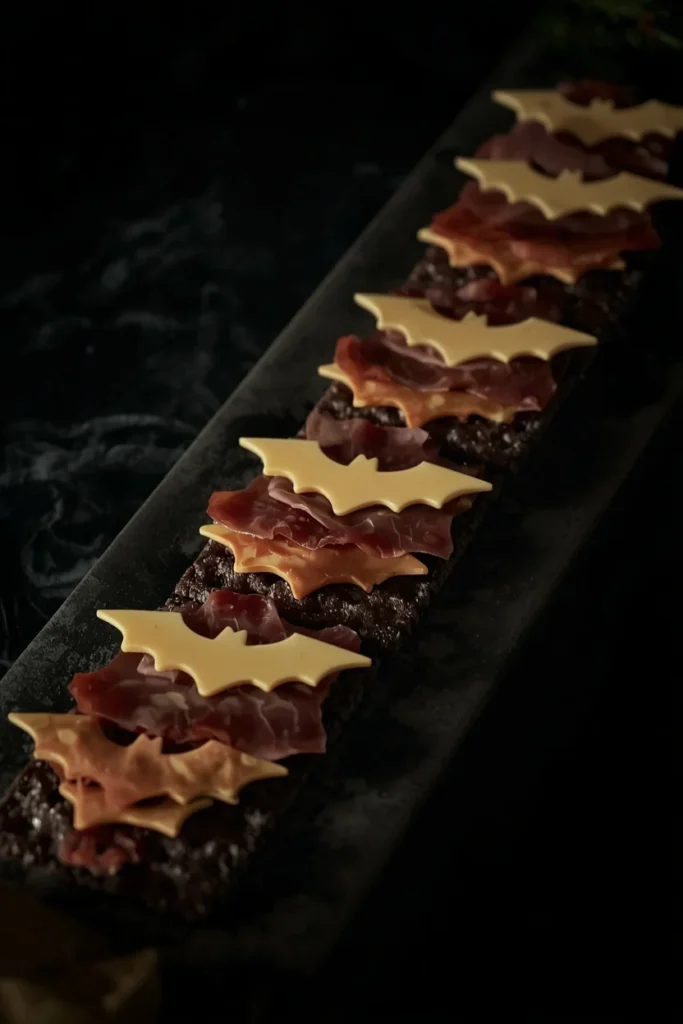
A small bat-shaped cookie cutter, run through thin slices of salami and firm cheese, produces one of the cleanest and most reusable Halloween shapes on this entire list, since the same cutter works on nearly any flat charcuterie item. Layer a bat-shaped cheese slice directly on top of a bat-shaped salami slice, offset slightly, so both silhouettes are visible at once and the piece reads as more dimensional than a single flat cutout. Scatter these in a loose “flight path” across one corner of the board, echoing the same diagonal arrangement that works well in Halloween wall decor, so the eye reads motion even in a still spread. This idea also works well as a garnish on top of dips, propped at the rim rather than laid flat. Because the cutter does all the shaping work, this is one of the fastest ideas on the list to execute at scale for a larger party.
11. Blood Orange and Pomegranate Accents
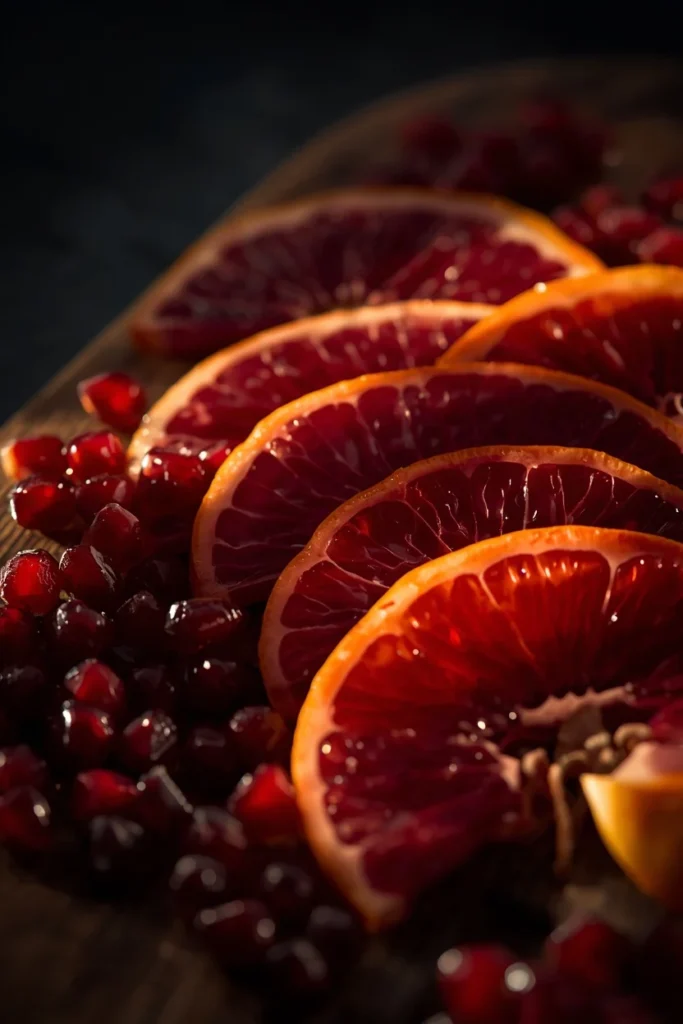
Thin blood orange slices, halved and fanned across an open section of the board, along with a small scattering of loose pomegranate arils, bring a genuinely rich, deep-red color into the spread that reads as elegant rather than gimmicky. These work especially well layered near the salami roses from Idea 5, since the color families echo each other and create a cohesive “dark jewel tone” zone on one side of the board. Pomegranate arils also catch light in a way that photographs beautifully, giving the board a few small points of sparkle among the matte textures of meat and cheese. This idea adds real nutritional and flavor variety too, cutting through the richness of the cheese and cured meats with something brighter and more acidic. Keep the fan of orange slices slightly overlapping, like shingles, so the shape stays intentional rather than scattered.
12. Ghost-Shaped Cheese Cutouts With Balsamic Drizzle
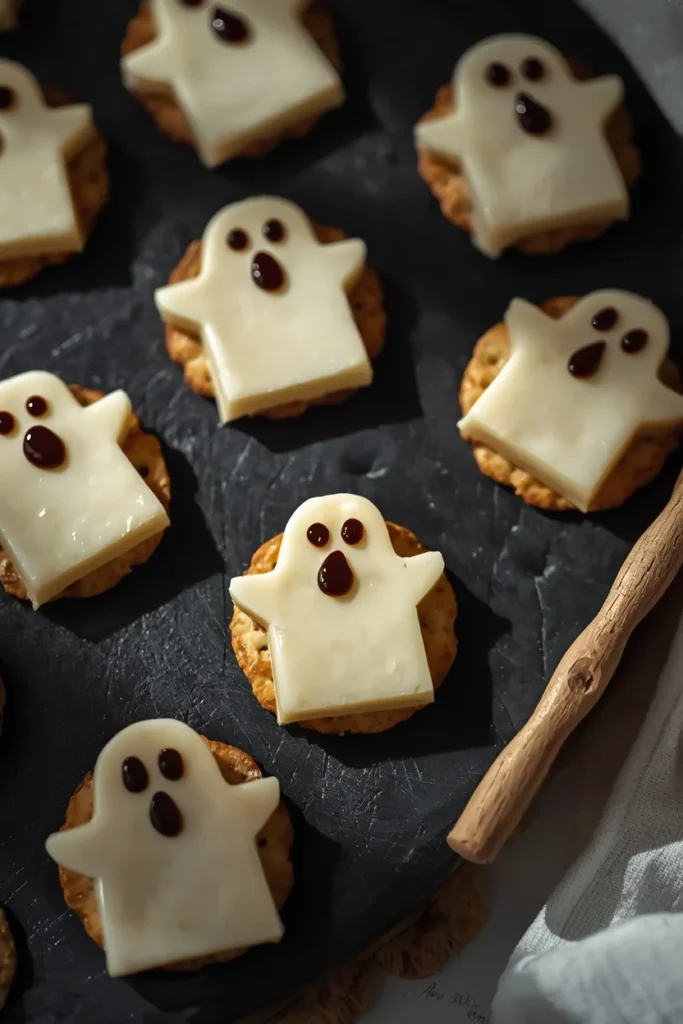
Sharp white cheddar or a firm mozzarella, cut into a simple rounded ghost silhouette using a small cutter or a paring knife freehand, gets its expression from two small dots of balsamic glaze for eyes and a thin curved line for a mouth. Place each ghost on its own small cracker so it’s easy for guests to grab without smudging the design, and keep the balsamic dots small since too much liquid will bleed into the cheese and blur the shape within an hour. Cluster four or five ghosts loosely near one edge of the board, at slightly different rotations, so they don’t look mechanically identical. This idea gives the board a lighter, whiter visual moment that balances out the darker tones from ideas like the salami roses and graveyard dip. It’s also naturally kid-friendly, since there’s no bitter or spicy element involved at all.
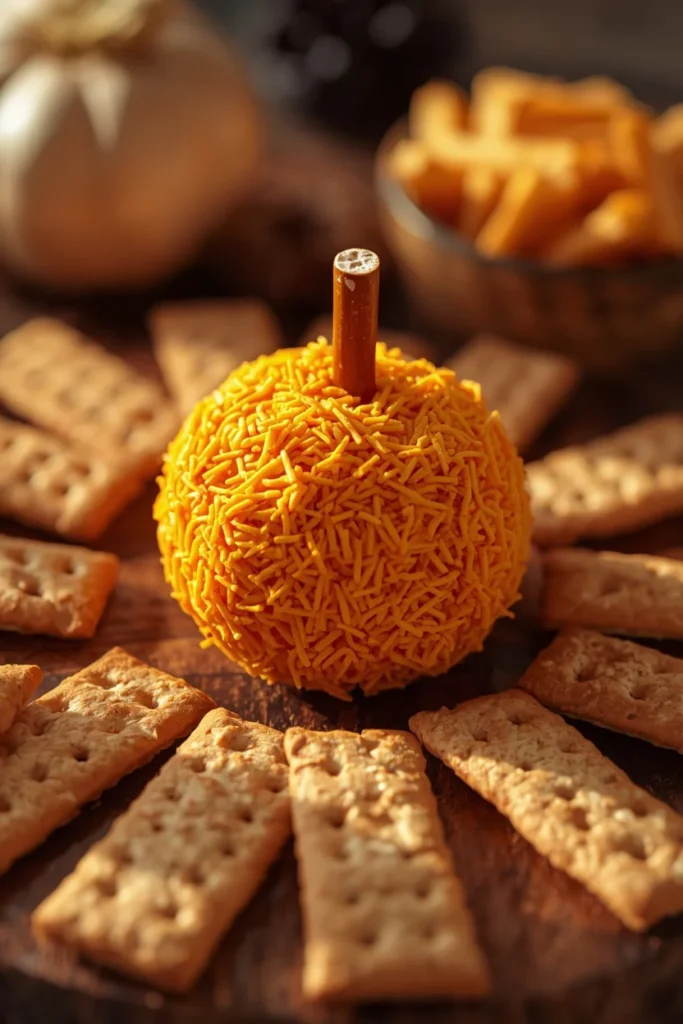
13. Pumpkin Cheese Ball as a Secondary Centerpiece
A cream cheese and cheddar ball, shaped round and lightly scored with the back of a knife to create pumpkin-style ridges, then finished with a small pretzel rod or broccoli stem as the stalk, works as a strong secondary centerpiece when your board is large enough for two anchor points. Coat the outside in shredded cheddar so the orange color reads clearly even from a distance, then set it opposite the mummy brie or Jack Skellington wheel so the two centerpieces balance each other visually across the board. Surround the base with a small ring of crackers angled outward, like sun rays, to give it a defined footprint rather than letting it float loosely among smaller items. This idea also works well made a day ahead, since the flavor deepens in the fridge and the ridge shaping actually holds better once fully chilled. It’s a strong pick if your crowd leans more toward familiar party classics than adventurous shapes.
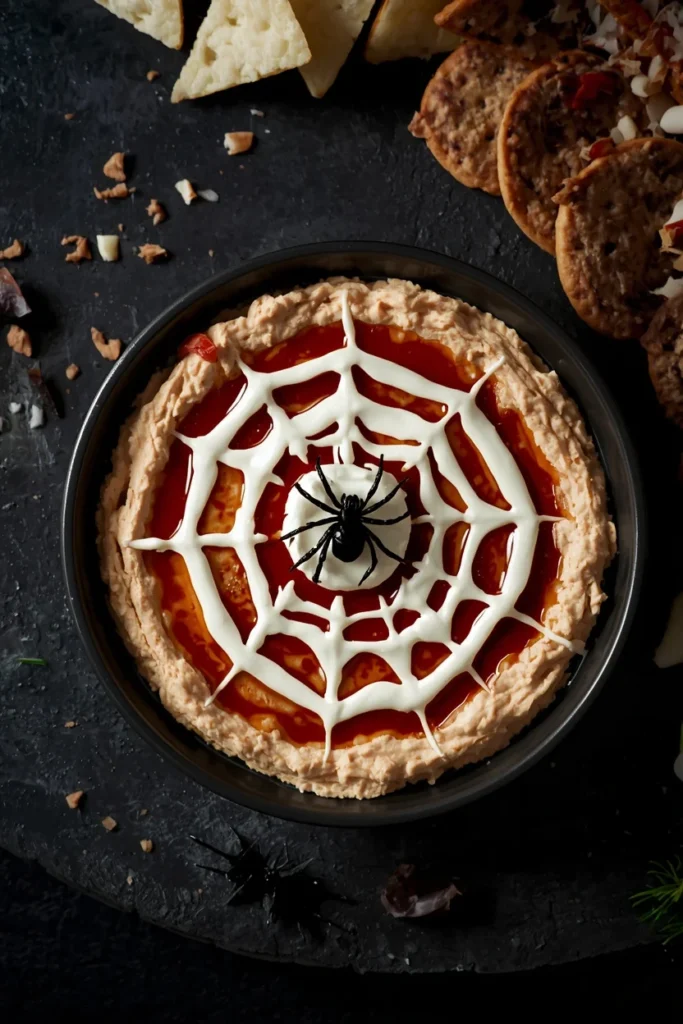
14. Spiderweb Dip Using a Simple Piping Technique
A round dip like spinach artichoke or hummus, topped with thin concentric circles of sour cream or dark balsamic piped from a small zip-top bag, then dragged with a toothpick from the center outward in six or eight straight lines, creates a genuine spiderweb pattern in under two minutes. Keep the lines evenly spaced and pull them all the way to the rim for the cleanest visual effect, since uneven spacing is the most common reason this technique looks messy instead of sharp. Place one small plastic or fondant spider at the center where the lines converge to finish the illusion. This works with almost any dip that has enough surface contrast to hold a piped pattern, meaning it’s one of the most flexible ideas on this list depending on what you’re already planning to serve. Because the technique is simple, it’s also one of the easiest ideas to delegate to a helper while you finish the rest of the board.
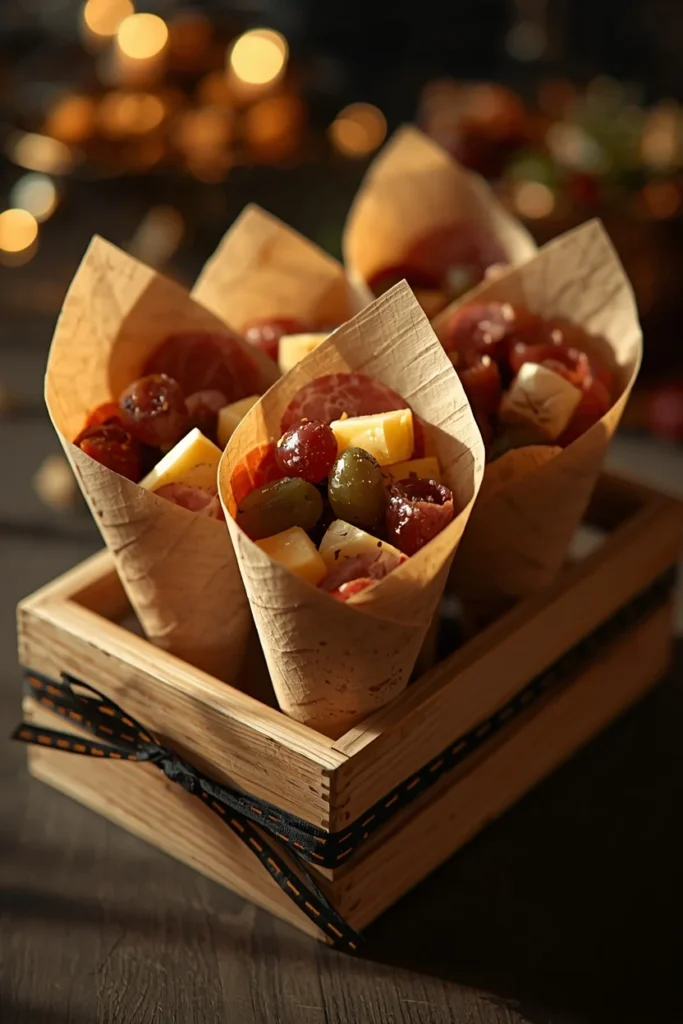
15. Charcuterie Cones for Grab-and-Go Portions
Small parchment or waxed paper cones, hand-filled with a rolled slice of meat, a cube of cheese, one cracker, and a few grapes, standing upright in a short glass or a small wooden crate, solve the real party problem of guests hovering and blocking the board while they build their own plate. Line six to eight cones along one edge of the spread so they read as an intentional design element, not overflow, and refill the crate as they empty rather than pre-filling more than will get eaten fresh. This idea works especially well for a standing or mingling party where guests don’t have table space to build a plate from a flat board. It also naturally portions the richer items, like meat and cheese, which helps if you’re serving a large or mixed-age crowd. Tie a small strip of black and orange ribbon around each cone for a finishing detail that costs almost nothing.
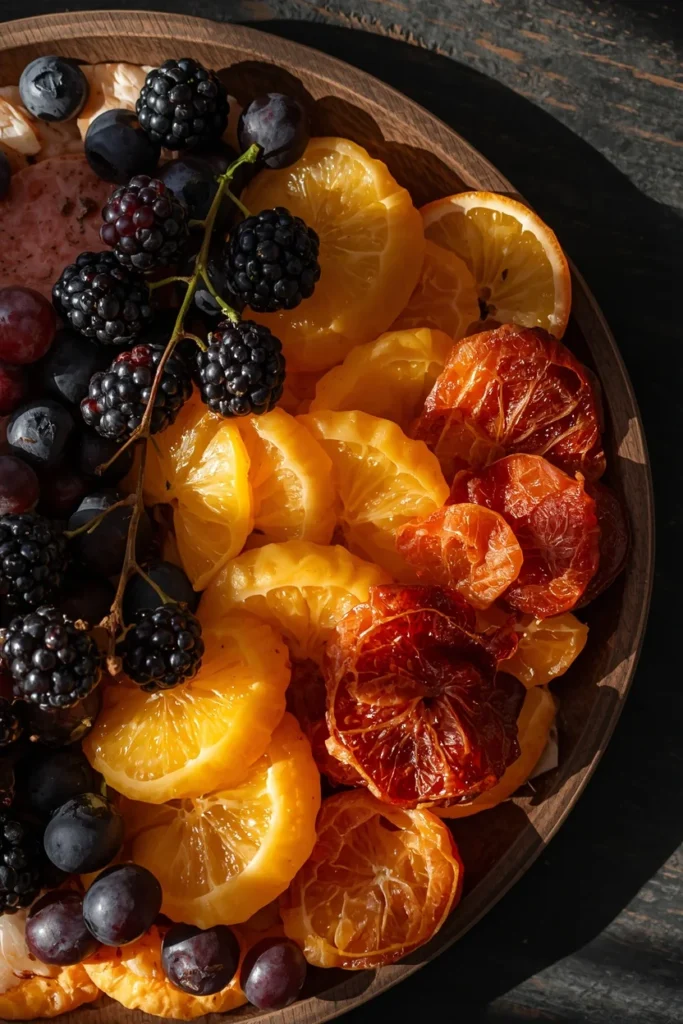
16. Black and Orange Color-Blocked Fruit Section
Dedicate one clear section of the board to fruit alone, arranged in two distinct color blocks — blackberries and black grapes on one side, orange segments and dried apricots on the other — meeting in the middle rather than mixed together randomly. This gives your board at least one section that reads as clean, graphic, and restful among the busier novelty shapes elsewhere on the spread, which matters for overall visual balance. Fruit also serves a real functional purpose here, cutting the richness of the meat and cheese sections and giving guests with dietary restrictions something substantial to reach for. Keep the two color blocks roughly equal in size so neither side reads as an afterthought. This section photographs particularly well in natural light, since the deep purple-black and warm orange tones contrast strongly even without any additional styling.
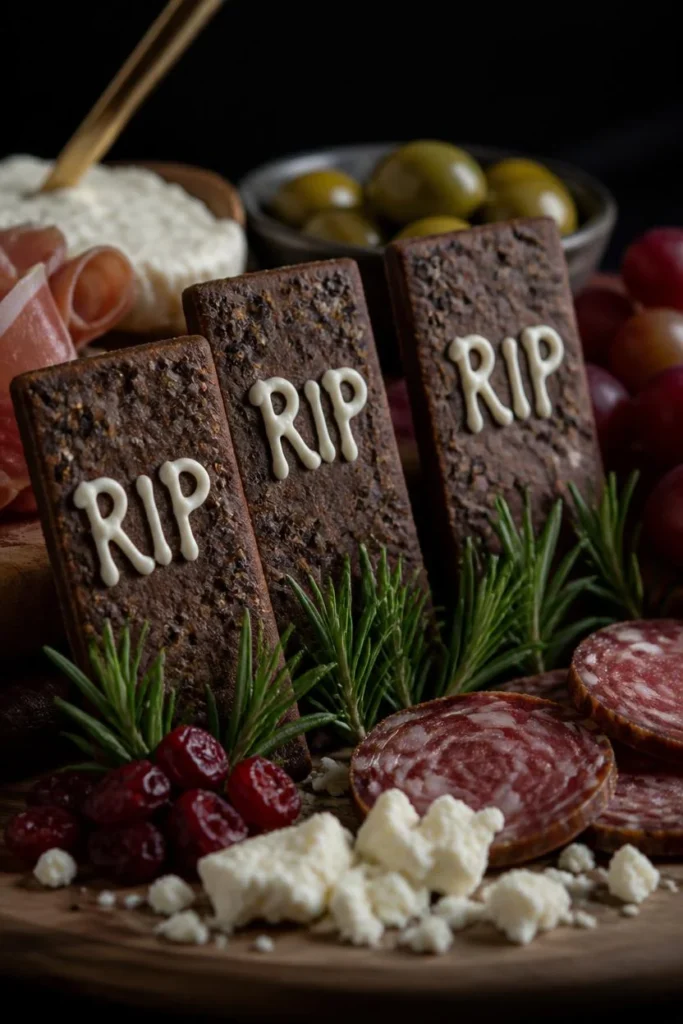
17. Tombstone Crackers With Piped Epitaphs
Rectangular gray or dark whole-grain crackers, propped upright at a slight lean using a small dollop of cream cheese as glue against another item, with a tiny piped “RIP” or a guest’s name in cream cheese or icing, create a genuine graveyard scene when clustered in groups of three or four. Lean them at slightly different angles rather than perfectly straight, since real tombstones never sit uniformly and the imperfection sells the visual joke. Tuck a few fresh rosemary sprigs at the base of the cluster to stand in for graveyard grass, connecting this idea visually to Idea 5’s rosemary garnish elsewhere on the board. This is a strong idea for a themed corner near the graveyard dirt dip from Idea 6, letting you build one fully realized “graveyard zone” rather than scattering the concept across the whole spread. It also gives guests a genuinely fun detail to point out to each other, which keeps conversation moving around the food table.
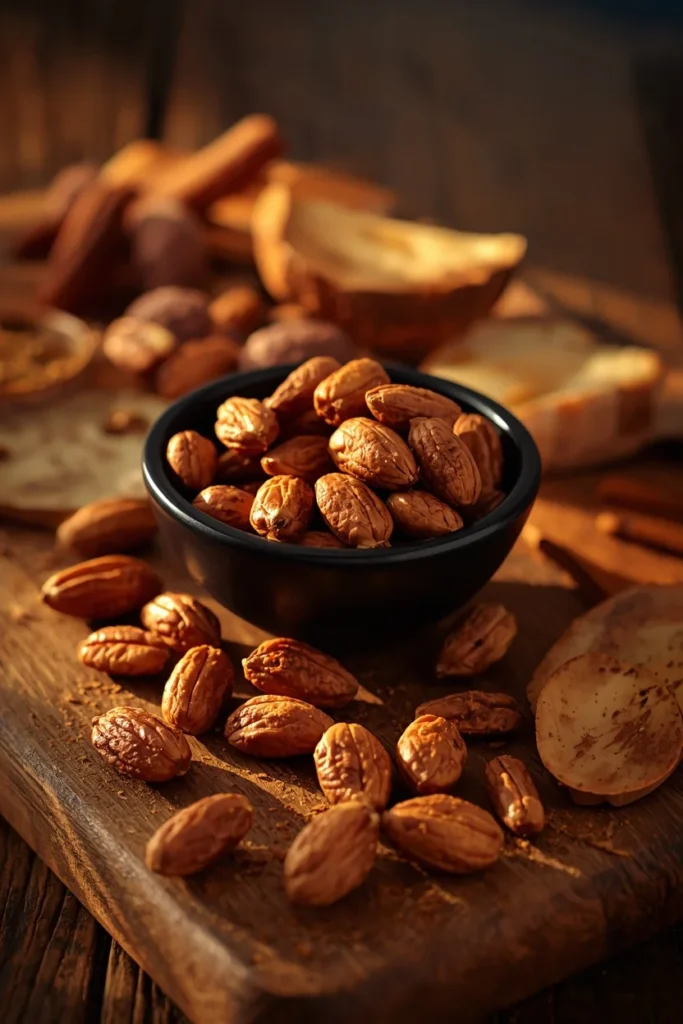
18. Spiced Nuts and Pepitas in a Small Cauldron
A second small black bowl, filled with warm-spiced mixed nuts or roasted pepitas tossed in cinnamon and a touch of cayenne, adds a savory-warm flavor note the rest of a Halloween board — heavy on meat, cheese, and sugar — often misses entirely. Choose a bowl in a different shape than the graveyard dirt cauldron from Idea 6 so the two don’t visually compete, even though both lean into the same “small vessel” styling trick. This idea also solves a textural gap, since nuts add crunch that contrasts with the softer cheeses and cured meats surrounding them. Position the bowl near the fruit section from Idea 16, since warm spice and fresh fruit pair naturally both in flavor and in a shared “lighter, more grown-up” zone of the board. Roast the nuts fresh the same day for the best aroma, which genuinely does add to how guests experience the board before they even take a bite.
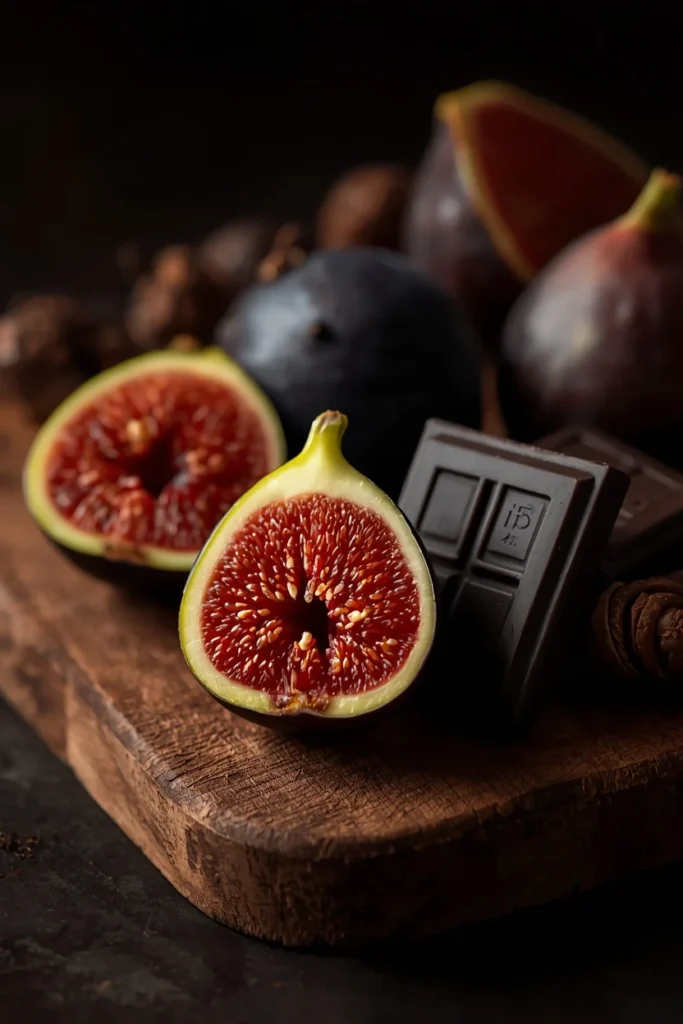
19. Dark Chocolate and Gothic Fruit Pairing
A small cluster of dark chocolate squares paired with fresh figs, cut in half to reveal their deep red interior, gives the board a sophisticated, almost gothic moment that works particularly well for an adults-only Halloween gathering leaning more “elegant dinner party” than “kids’ costume parade.” Arrange the fig halves cut-side up so the jewel-toned interior stays visible, then lean two or three dark chocolate squares against the base of each fig for a small, intentional grouping rather than a scattered pile. This idea gives your board genuine dessert-level richness without needing to bake anything, since good chocolate and ripe figs need almost no preparation to look intentional. It pairs especially well positioned near the blood orange and pomegranate section from Idea 11, continuing the same deep jewel-tone color story into one cohesive corner. This combination consistently reads as the most “adult” pairing on the entire board, useful if you want at least one section that isn’t aimed at kids.
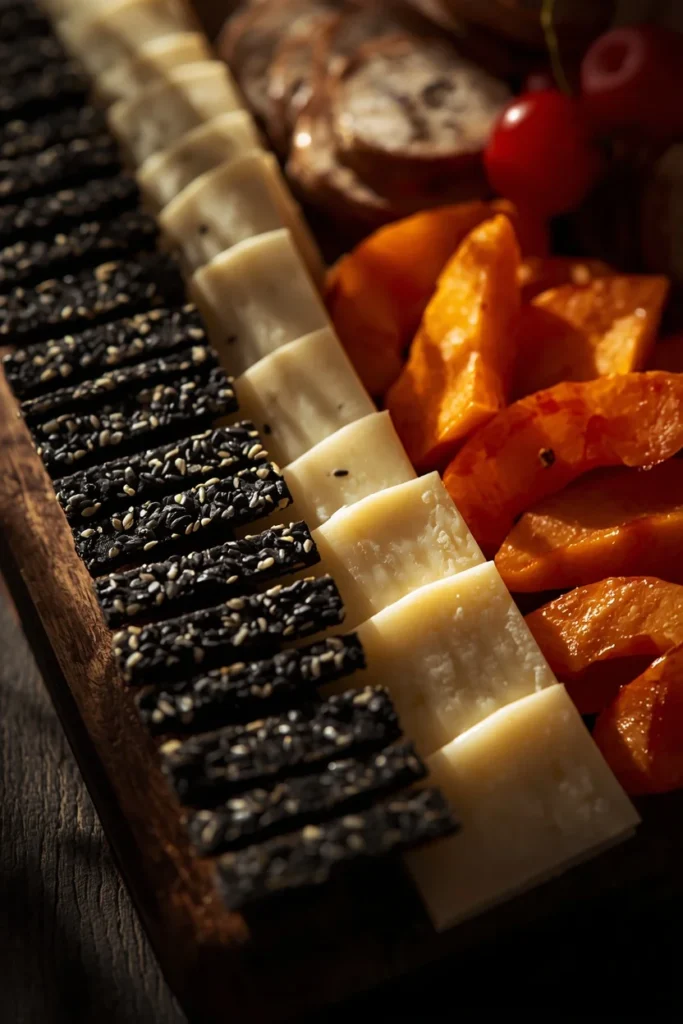
20. Black Sesame or Squid Ink Crackers for a Gothic Base Layer
Swapping standard water crackers for black sesame crackers or squid ink crackers changes the entire visual foundation of the board, since the dark base makes every lighter topping — pale cheese, orange fruit, bright dip — read with far more contrast than it would against a beige cracker. Line one full edge of the board with these dark crackers, slightly overlapping like shingles, so they function as a visual border that frames everything else. This idea works especially well if your board is otherwise leaning heavily orange and cream, since it introduces true black as a real material on the board rather than only as an accent color in smaller garnishes. Because the flavor is genuinely different from a standard cracker, briefly note it near the board if any guests have a seed or ink sensitivity. This is a small swap with a disproportionately large visual payoff, and it’s one of the easiest ideas on this list to execute since it requires zero prep beyond choosing the right box at the store.
21. A Signature Halloween Cocktail or Mocktail Corner
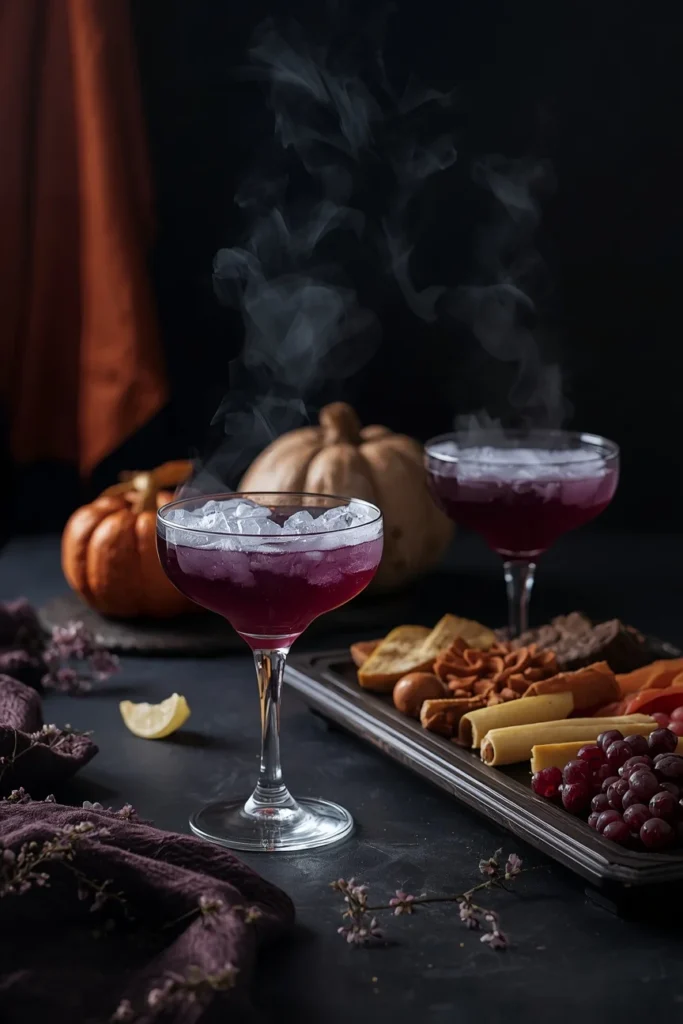
Round out the board’s visual story by staging one small drink station beside it — a deep purple or black-tinted cocktail (or a non-alcoholic version using blackberry syrup and soda) served in coupe glasses with a dry-ice effect or a single edible flower frozen into an ice cube. Keep the glassware clustered tightly next to the board rather than on a separate table, since guests naturally photograph food and drink together when they’re styled as one scene. Choose a drink color that echoes something already on the board — the deep red of the figs, the black of the sesame crackers — so the whole tablescape reads as a single designed moment instead of two unrelated setups pushed together. This idea also gives your Halloween spread a genuine “wow” element that has nothing to do with food shapes or cutouts, which helps the board feel complete rather than repetitive. If using dry ice, always keep it in a heatproof container and never let guests touch it directly, since it can cause skin burns.
Styling Tips
Build the board in layers, starting with your bowls and cheese wheels first since those are the tallest, heaviest anchor points, then fill in crackers and meats around them, and finish with loose garnishes like grapes, nuts, and herbs last so they land in the gaps rather than getting buried. Work in odd-numbered clusters of three or five for repeated small items, since asymmetry photographs more naturally than a perfectly even grid. Let at least one dark color — black olives, black grapes, or black sesame crackers — run through multiple sections of the board so the whole spread feels connected rather than like separate zones competing for attention. Leave small gaps of visible board or table between clusters; a board packed edge-to-edge with zero negative space tends to photograph as cluttered rather than abundant.
Practical Implementation Ideas
Plan for roughly two to three ounces each of meat and cheese per guest if the board is the main food offering, and scale down if it’s one of several dishes at the party. Prep anything that can be made a day ahead — the pumpkin cheese ball, spiced nuts, and dips — first, then handle same-day items like the salami roses and cheese cutouts within a couple hours of serving so they stay fresh and hold their shape. Set the board out no more than 30 to 45 minutes before guests are expected if it includes soft cheeses or dips, both for food safety and because items like the ghost cheese cutouts start to soften and blur at room temperature. Keep a small refill tray prepped in the fridge so you can quietly restock popular items like the eyeball grapes without breaking down the whole display mid-party.
Common Mistakes to Avoid
Trying to fit all 21 ideas onto one board almost always backfires — pick six to nine ideas that complement each other in color and theme rather than everything on this list at once. Placing every dark or gory-looking item in one corner throws off the visual balance of the whole board, so distribute your darkest and lightest elements across the spread rather than grouping them. Skipping the negative space between clusters is the single most common reason a homemade board looks messy compared to the polished ones online, so resist the urge to fill every open inch. Serving raw dry ice effects without a heatproof barrier or clear guest instructions is a genuine safety risk, not just a styling detail, so handle that element carefully if you include it.
Small-Board Alternatives
For a smaller gathering or a single serving board, choose one centerpiece (Idea 1, 2, or 13), two small accent items (Idea 3 and Idea 8 pair well together), and one dip (Idea 6 or Idea 14) rather than attempting the full spread at reduced scale. If you don’t have a coffin-shaped bowl for Idea 4, any small rectangular dish framed with a few extra dark crackers along the long edges creates a similar visual effect. No piping bag for the spiderweb dip in Idea 14? A resealable sandwich bag with one corner snipped off works identically. If space is limited to a single small table, skip the separate cocktail station in Idea 21 and instead place two or three drinks directly on the board’s corner using coasters to protect the surface.
Budget-Friendly Alternatives
Skip specialty coffin-shaped bowls for Idea 4 and use any small dish you already own, since the food coloring and cracker framing do most of the visual work anyway. Store-brand crackers and cheese work identically well for the cutout shapes in Ideas 10 and 12, since the cutter shape is what sells the theme, not the price point of the ingredients. A simple chocolate pudding cup from the grocery store works just as well as homemade pudding for the graveyard dirt dip in Idea 6. Buy nuts and dried fruit in bulk bins rather than pre-packaged for Ideas 18 and 16, which typically costs significantly less for the same quantity.
Pro Styling Recommendations
Photograph the board from directly overhead once it’s fully assembled, since that’s the angle that makes every shape and color-block idea on this list actually legible, unlike an angled shot that flattens the layout. Chill your serving board or platter in the fridge for 20 minutes before assembling if you’re including soft cheeses, since this keeps everything firmer and easier to shape during the styling process itself. If you’re hosting a themed party, echo the board’s darkest color — usually black from the olives, crackers, or cauldron bowls — somewhere else on the table, like in the napkins or tablecloth, so the food doesn’t look disconnected from the rest of the setup. Assemble the board on the surface it will actually be served on rather than building it elsewhere and transferring it, since moving a finished board almost always disturbs the careful layering you just did.
FAQs
Conclusion
The best Halloween charcuterie boards aren’t the ones with the most items crammed onto them — they’re the ones where six or seven well-chosen ideas actually talk to each other through color, shape, and placement. Pick one centerpiece, one dip, a couple of accent shapes, and let the negative space do the rest. That’s the difference between a board that looks like snacks on a plate and one your guests photograph before they even ask what’s on it.