19 Christmas Tree Charcuterie Board Ideas for Your Party
Every Christmas tree charcuterie board photo looks the same at first glance — meat, cheese, a sprig of rosemary, done. What actually separates the ones that hold up through a whole party from the ones that look sad by hour two is technique nobody’s really explaining.
This guide covers that. Below are 19 real ways to build a Christmas tree charcuterie board — the flat layout versus the styrofoam cone debate, actual quantity guidance so you’re not guessing how much cheese to buy, food-safety timing that matters more at a holiday party than any other time of year, and every major variation from classic savory to dessert, breakfast, vegan, and budget-friendly.
Table of Contents
Classic Flat Savory Tree
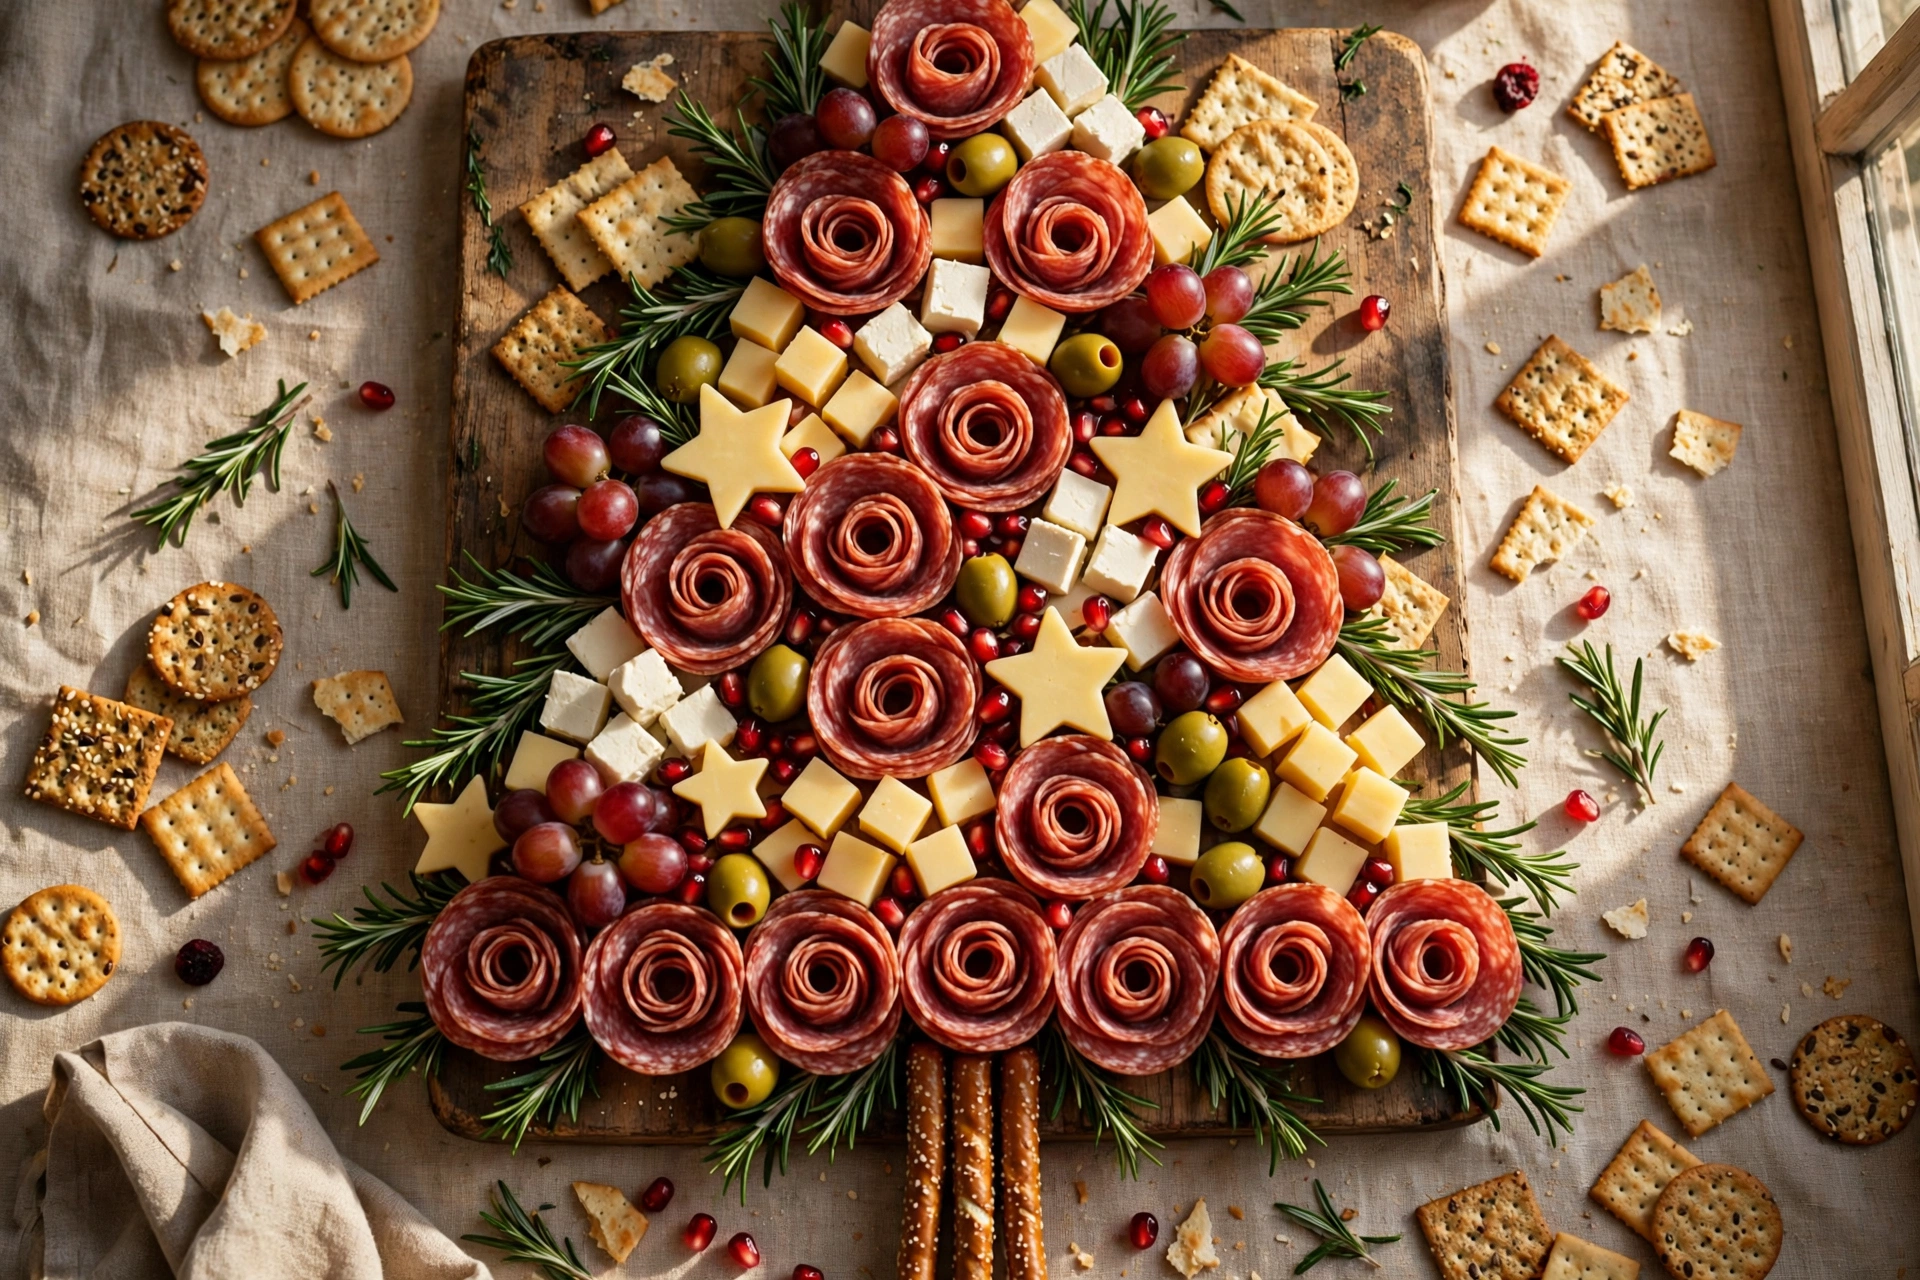
Building the tree shape flat directly on a large board or platter, rather than pinning ingredients to a standing foam cone, is genuinely the more practical method for a party, since guests can pull pieces from anywhere on the tree without toppling anything or leaving an awkward gap. Start with a substantial base layer, like folded slices of salami or cubed cheese, arranged in a wide triangle shape and working upward in slightly narrower rows toward a single point at the top. Alternate colors row by row, red grapes or cherry tomatoes in one row, green olives or grapes in the next, so the tree reads clearly from across the room rather than looking like a random scatter of food. Fill gaps between larger pieces with smaller items like nuts, berries, or crackers rather than leaving visible empty board space, which is what actually makes the tree shape hold together visually. This version also feeds more people per square foot of board than a narrower cone shape, which matters for a real party rather than a photo.
Spiral Skewer Cone Tree
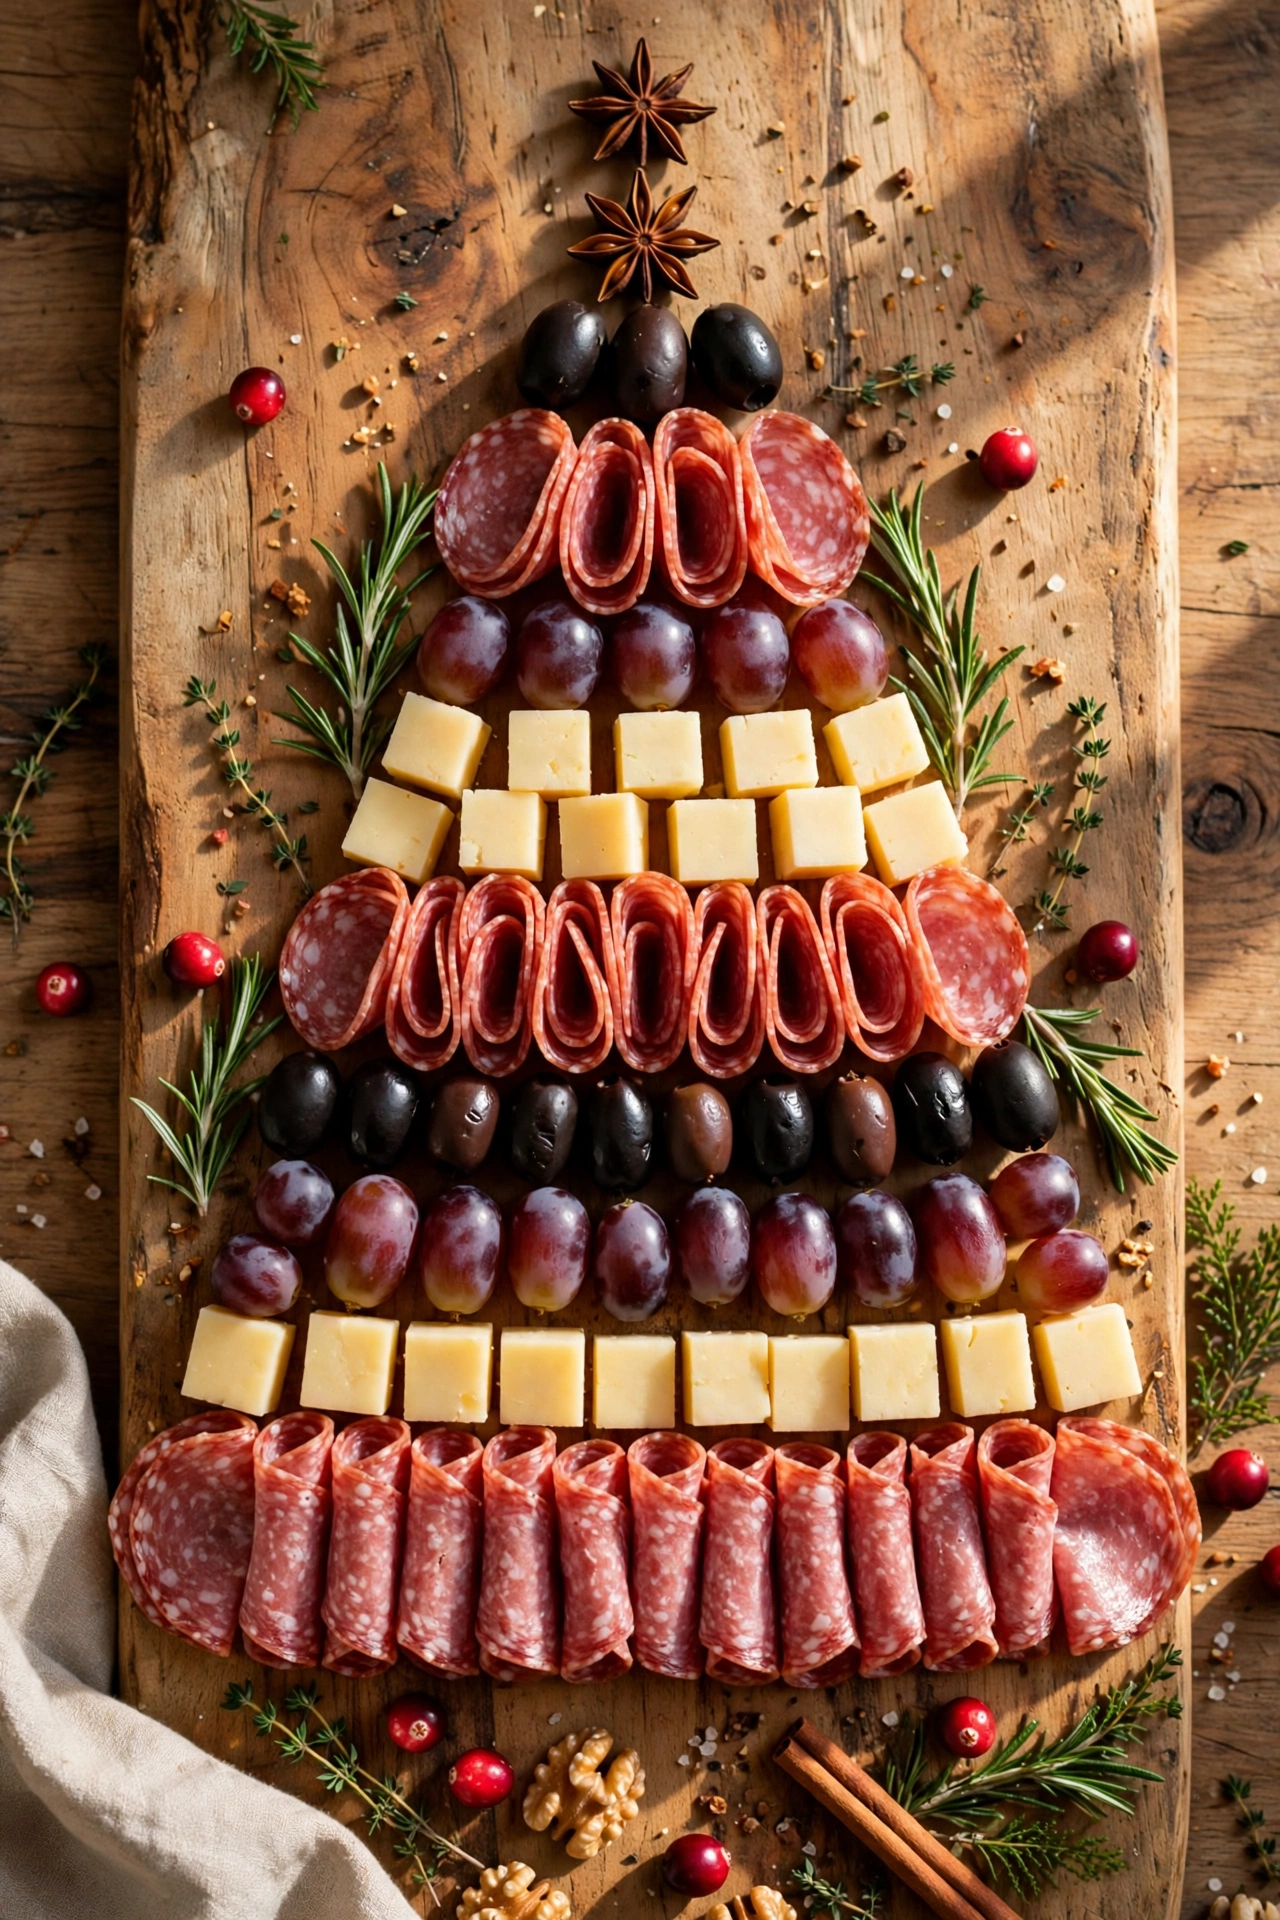
For a genuinely three-dimensional showpiece rather than a flat board, a foam cone wrapped in parchment or lettuce leaves and covered in food-safe skewers, each holding a small bite of meat, cheese, or fruit, creates real height and drama on an appetizer table. Insert the skewers in an ascending spiral pattern starting from the base and working upward, rather than in straight vertical rows, since the spiral is what actually reads as a tree shape from across the room instead of a lumpy cone. Use short, uniform skewer lengths so the finished silhouette stays smooth and cone-shaped rather than spiky and uneven. Be aware this version is genuinely trickier for guests to interact with at a party, since pulling a skewer from the middle of the design can leave a visible gap, so this works best as a display piece with a separate flat board doing the actual heavy lifting for serving. Assemble this one as close to serving time as reasonably possible, since foam cones don’t refrigerate well once fully skewered.
Rosemary “Pine Needle” Garnish
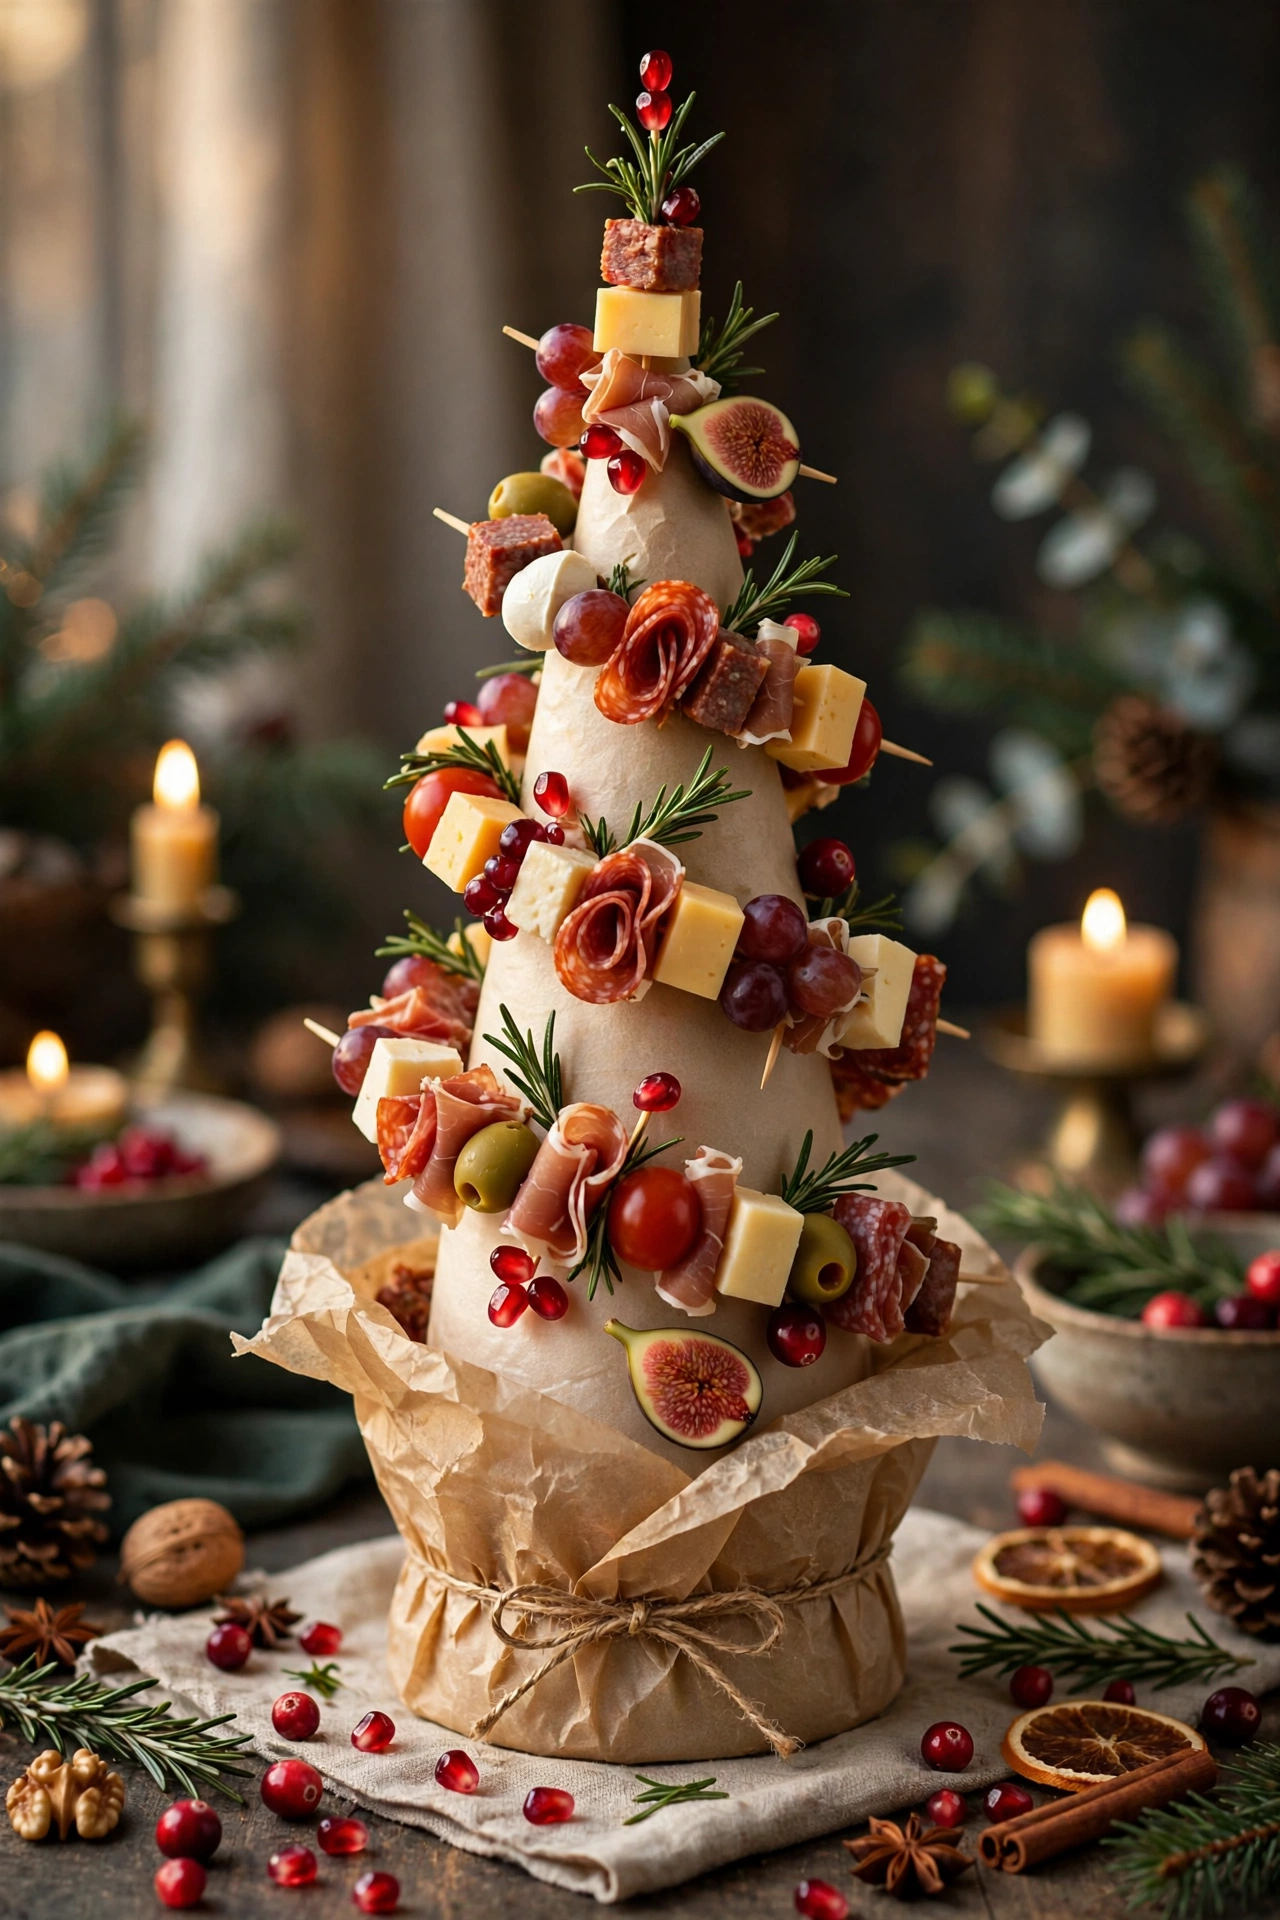
Tucking small sprigs of fresh rosemary between the food items throughout the tree shape does more to sell the “pine tree” illusion than almost any other single detail, since the thin needle-like leaves genuinely resemble pine branches once nestled among the other ingredients. Break larger rosemary sprigs into smaller two- to three-inch pieces and tuck them at slight angles into gaps between cheese cubes and fruit, rather than laying full-length sprigs flat on top, which reads as more integrated into the tree’s structure. A light misting of water on the rosemary right before serving keeps it looking fresh and vibrant rather than wilted throughout the party. This is one of the least expensive and most effective styling details on this entire list, often costing just the price of a single small package of fresh rosemary from the grocery store. Sage or fresh thyme sprigs work as a substitute if rosemary isn’t available.
Star-Cut Cheese & Fruit Toppers
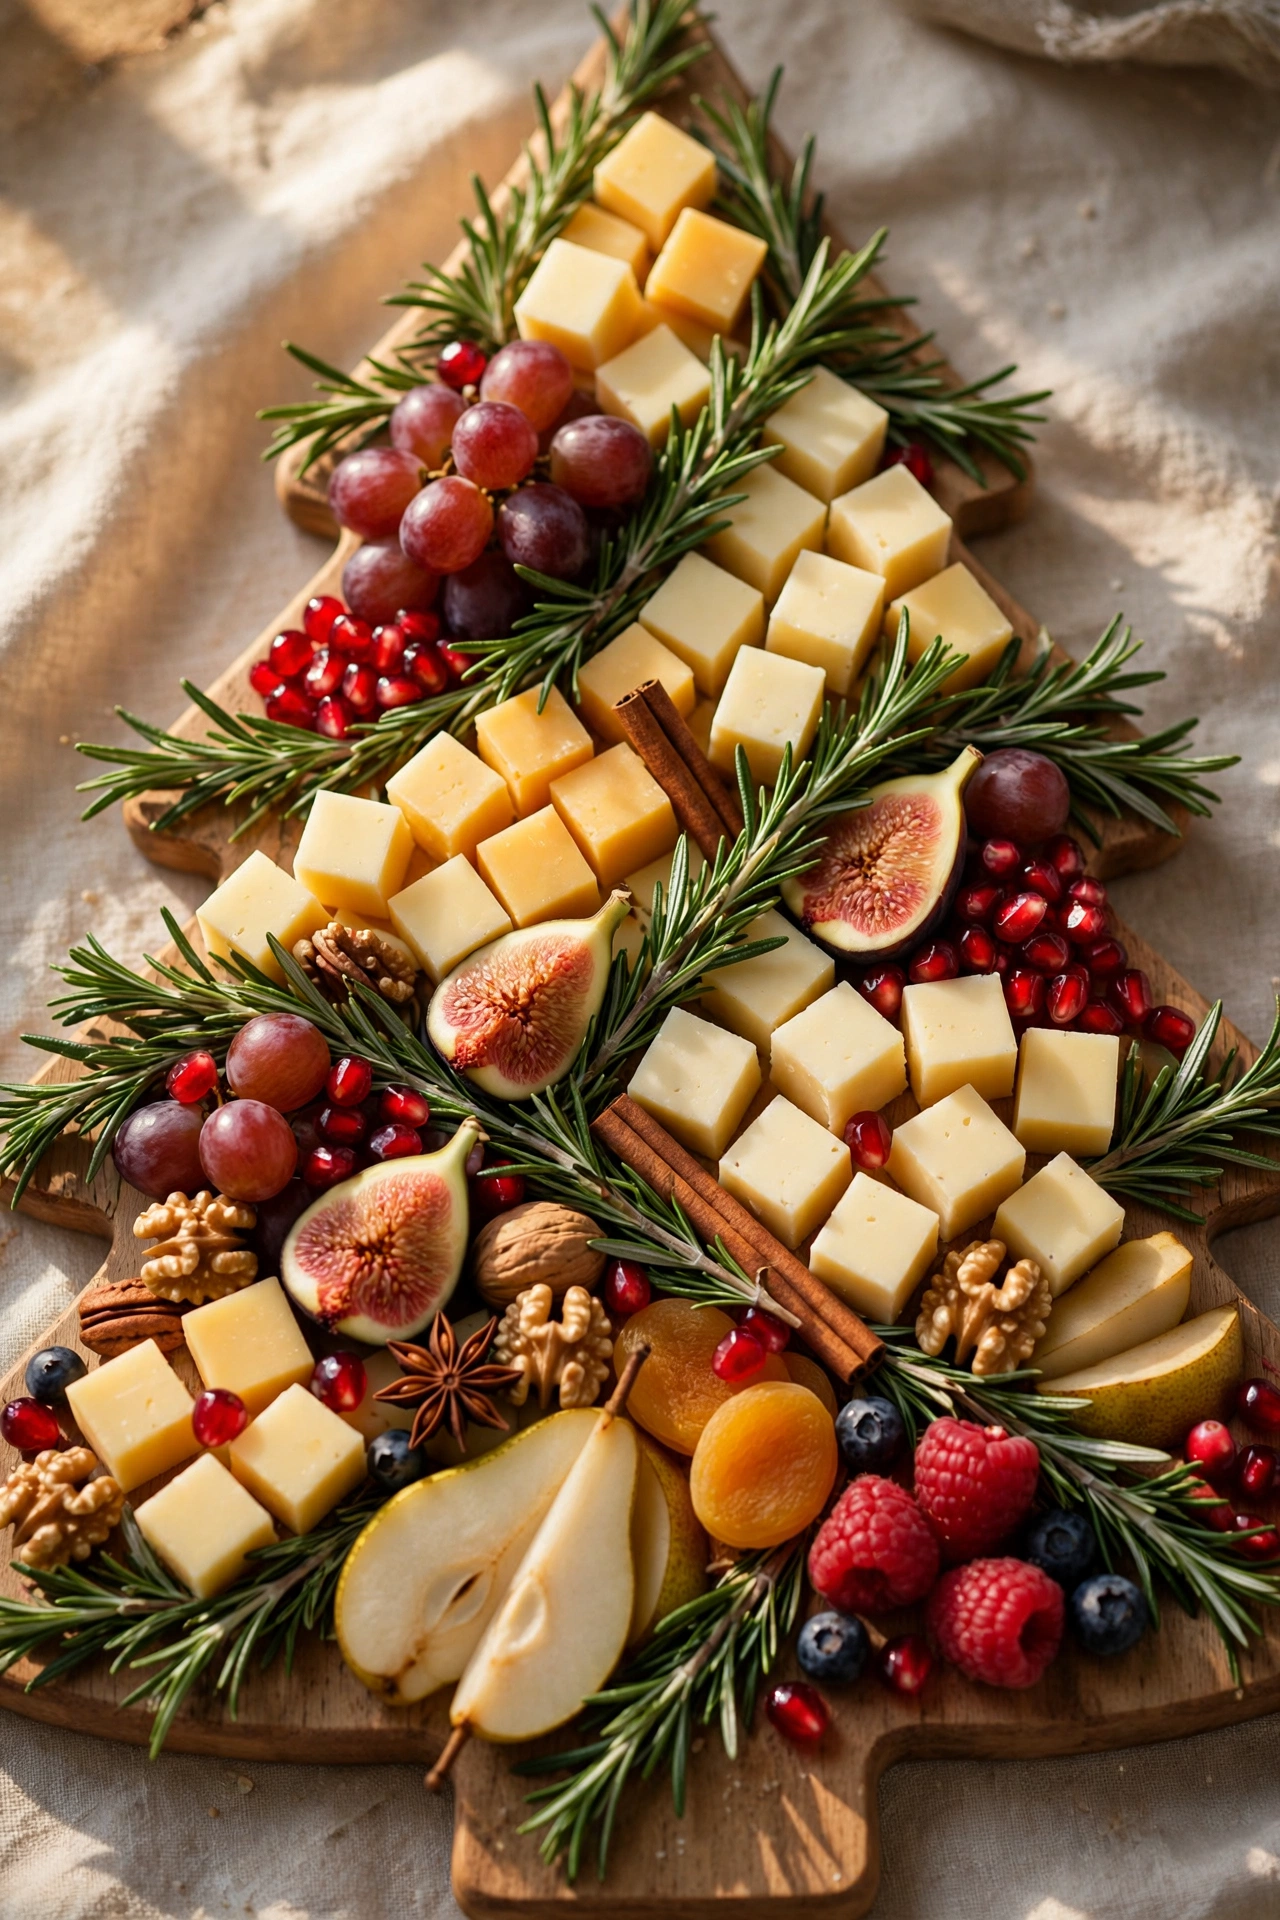
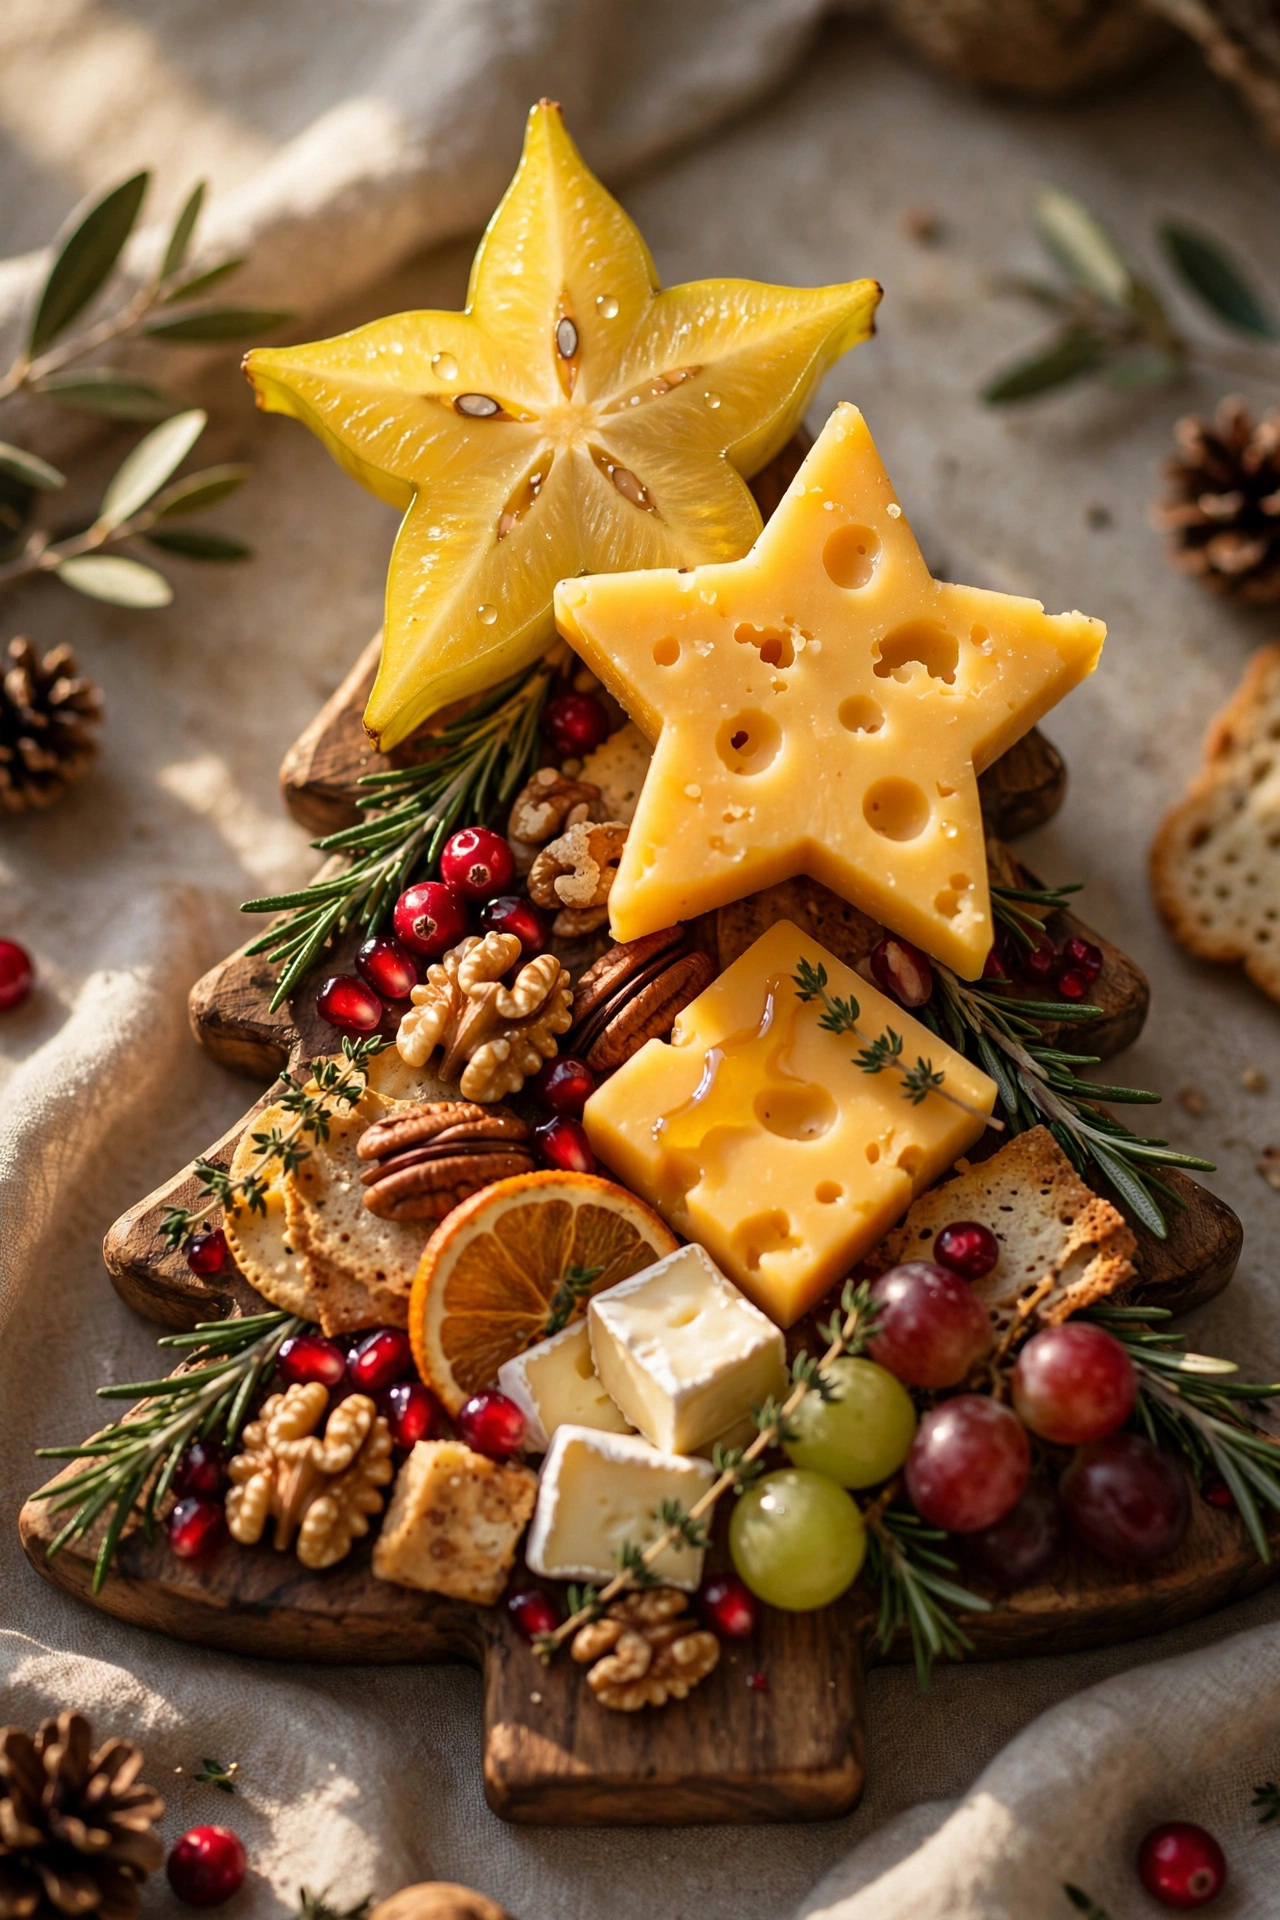
A small star-shaped cookie cutter, pressed into slices of firm cheese, star fruit, or persimmon, creates an easy decorative topper for the very peak of the tree without requiring any real cutting skill. Choose a cheese firm enough to hold a clean cut, like cheddar or gouda, since softer cheeses tend to tear rather than cut cleanly with a small cutter. Star fruit needs almost no preparation at all beyond slicing crosswise, since its natural shape already resembles a star once cut into rounds. Placing this star topper at the very tip of the tree, in place of an actual tree topper ornament, ties the whole shape back to its Christmas tree inspiration in a way that feels intentional rather than incidental. This detail takes only a minute or two but consistently reads as one of the more “wow” elements guests notice on the board.
Related: 15 DIY Gingerbread Christmas Tree Ideas to Try This Year
Dessert Charcuterie Tree
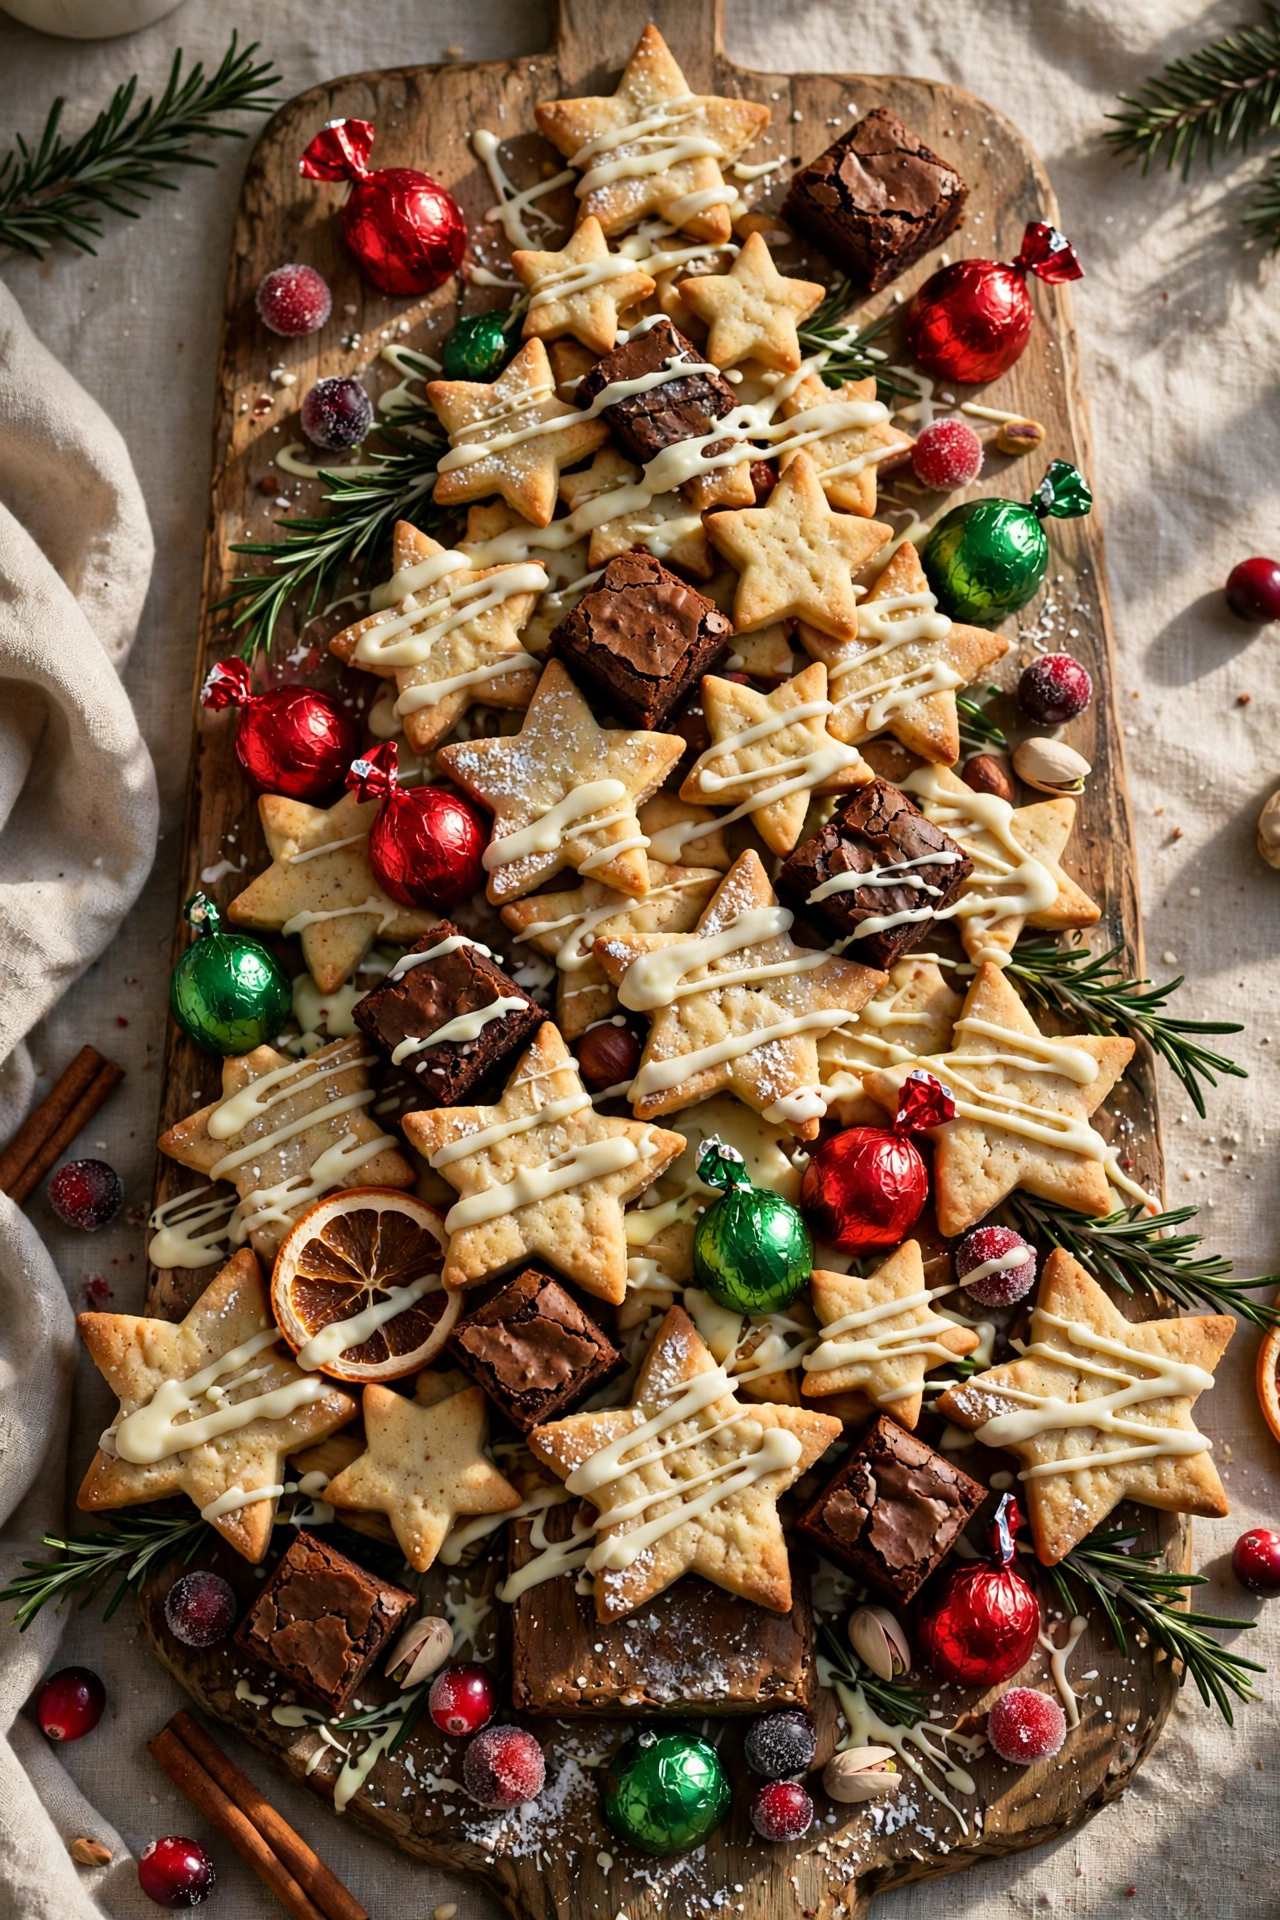
Swapping meats and cheeses entirely for cookies, chocolate, and candy turns the same tree-shaped layout into a full dessert spread that works beautifully alongside or instead of the savory version. Build the base with larger items like brownie bites or star-shaped shortbread cookies, then layer upward with smaller candies, chocolate-covered pretzels, and mini marshmallows, following the same alternating color and narrowing-triangle technique as the savory version. A drizzle of white or dark chocolate across the finished tree, right before serving, adds a festive “snow” effect and helps visually tie together items that might otherwise look scattered. Foil-wrapped chocolates in red and green work especially well as color-blocking pieces, the same way olives and tomatoes function in a savory tree. This version is a strong choice for a kid-heavy party or as a second board alongside a savory tree so every guest has an option they’re excited about.
Breakfast & Brunch Charcuterie Tree
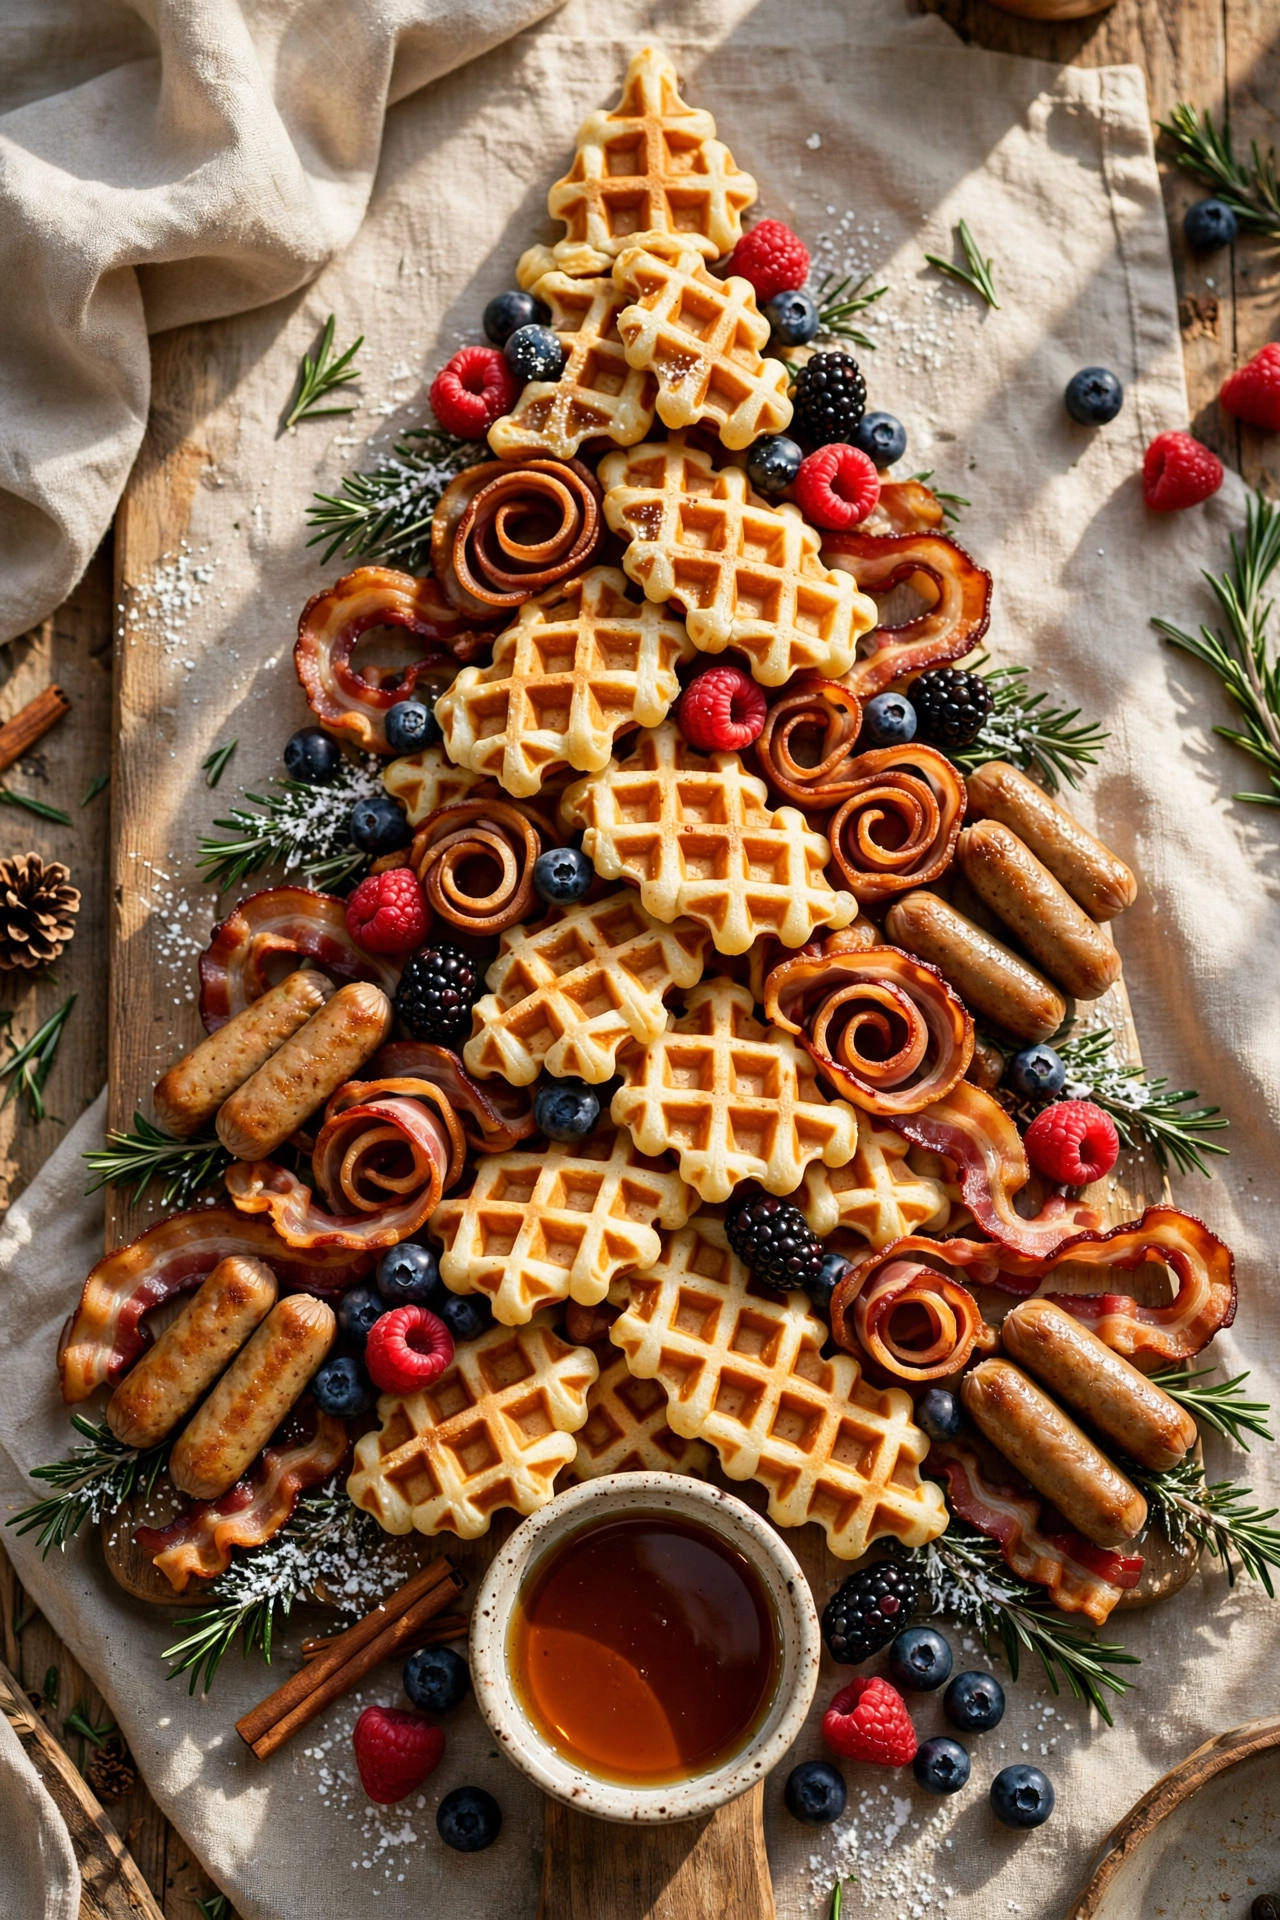
For a Christmas morning spread while presents are being opened, swapping in breakfast items like mini waffles, breakfast sausage links, scrambled egg bites, and fresh berries turns the same tree shape into a grazing brunch board. Use small waffle pieces or pancake bites as the sturdier base layer, since they hold their shape well and provide a solid foundation the way cheese or salami does in the savory version. A small bowl of syrup or whipped cream tucked at the base of the tree, styled like a present sitting beneath it, gives guests something to dip into without needing to pour it directly over the whole display. Bacon strips, curled slightly for texture, work well as a border or trunk detail rather than mixed throughout the tree shape itself, since their color and shape are different enough from the rest of the ingredients to stand apart cleanly. This version is an easy way to make an ordinary Christmas morning breakfast feel like a genuine event without much extra cooking effort.
Vegan Charcuterie Tree
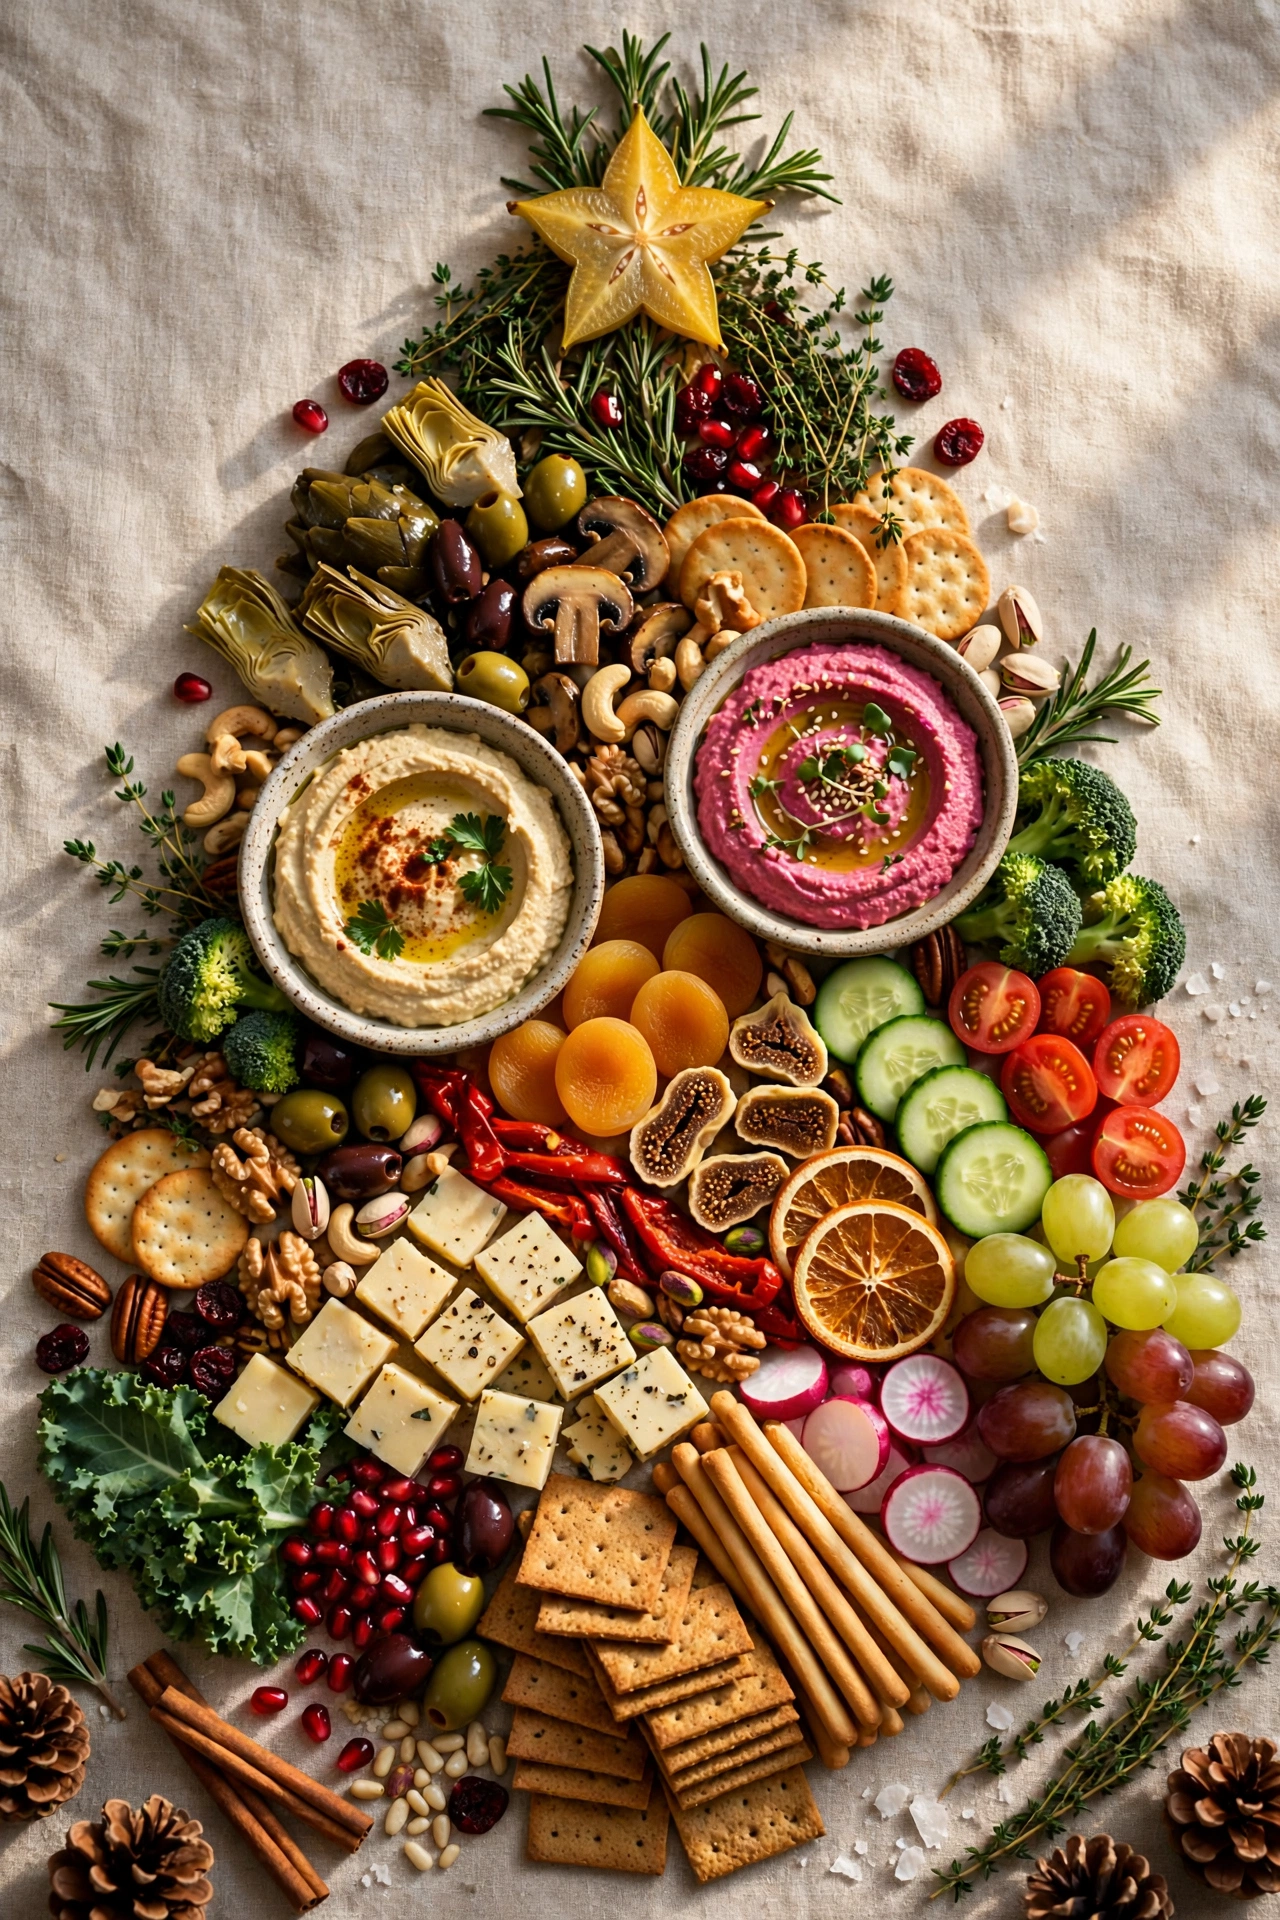
Building the tree entirely from plant-based ingredients, using marinated vegetables, plant-based cheese alternatives, hummus, and a wide variety of fresh and dried fruit, proves this concept works just as well without any animal products at all. Roasted or marinated vegetables like artichoke hearts and sundried tomatoes provide the same substantial, savory base role that meat plays in a traditional charcuterie tree. Several small bowls of hummus in different flavors, tucked at the base of the tree like gifts, add a creamy element and a place for guests to dip crackers or vegetable pieces. Dried fruits like apricots and dates add natural sweetness and a chewy texture that helps balance the crunchier fresh vegetables and crackers throughout the rest of the tree. This version is worth building even for a mixed-diet party, since it tends to appeal broadly beyond guests who are specifically vegan or vegetarian.
Gluten-Free Charcuterie Tree
Swapping standard crackers for gluten-free varieties and double-checking that meats, cheeses, and any premade dips don’t contain hidden gluten-based fillers makes this same tree shape safe for guests avoiding gluten without requiring a completely separate board. Rice crackers, seeded gluten-free crackers, and vegetable slices like cucumber rounds or bell pepper strips all work well as sturdy dippers that hold up to cheese and dips the way a traditional cracker would. Reading ingredient labels carefully on cured meats matters here specifically, since some processed meats use gluten-containing fillers or coatings that aren’t obvious from the ingredient name alone. Labeling this board clearly at the party, even if it’s the only board available, helps gluten-sensitive guests feel confident grabbing from it without needing to ask. This version costs roughly the same as a standard charcuterie tree, since gluten-free crackers and produce are widely available at most grocery stores now.

Kid-Friendly Mini Tree
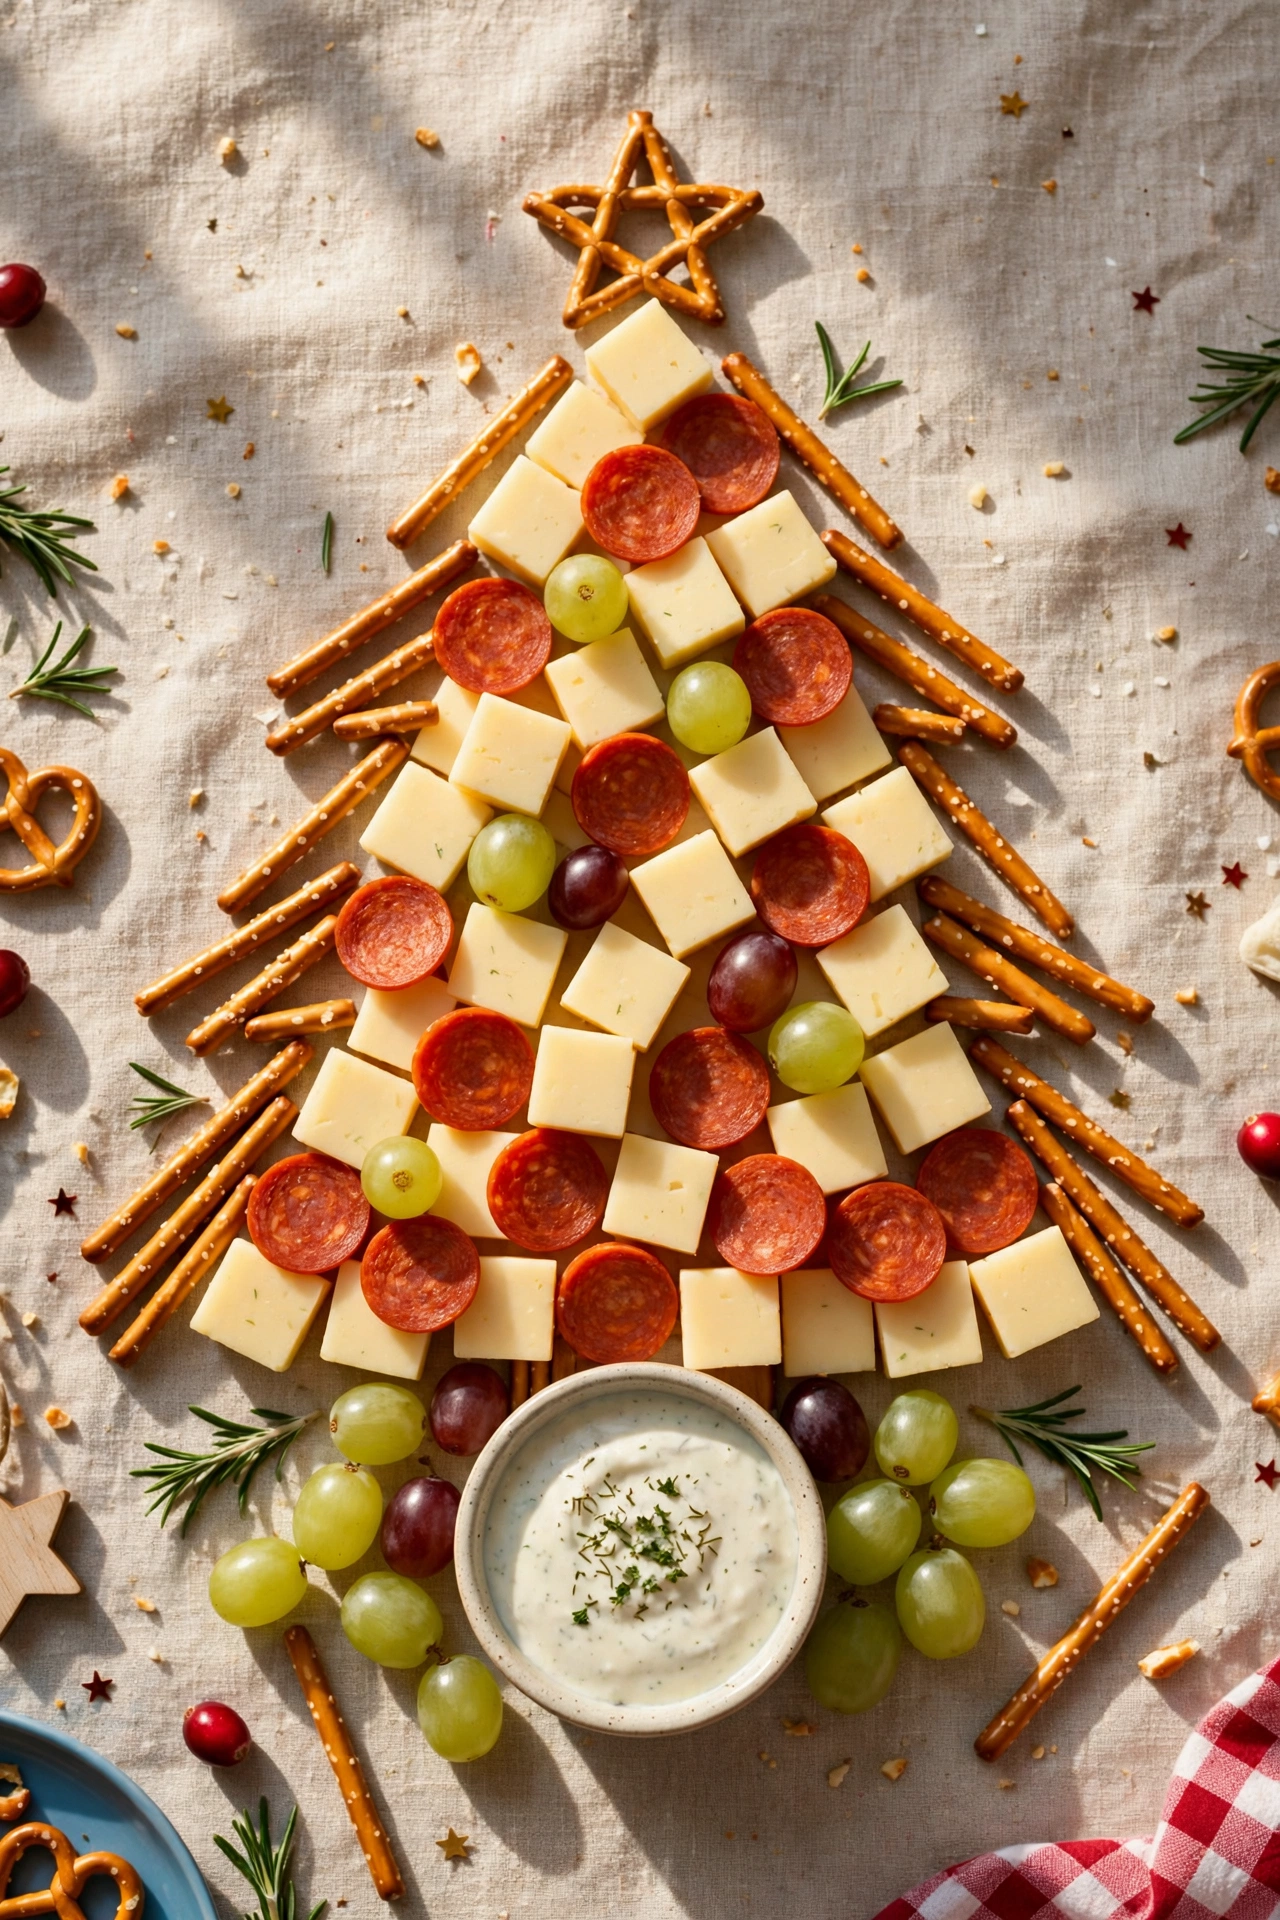
Scaling down both the size and the ingredient list to kid-favorite basics, like mild cheese cubes, mini pepperoni, pretzel sticks, and grapes, turns this into an appetizer kids will actually eat rather than pick apart looking for something familiar. Skip anything too adventurous, like strong cheeses, olives, or unusual dried fruits, and stick to recognizable, mild flavors arranged in the same festive tree shape as the adult version. A small cup of ranch or a mild dip tucked at the base gives kids something familiar to pair with vegetables or crackers. Building this as a separate, smaller board rather than trying to make one board serve both adults and kids means both groups get a version they’re genuinely excited about instead of kids picking around ingredients they don’t like. This is also a good project to let kids help assemble themselves, since the ingredients are simple enough for small hands to place without much supervision.
Budget Grocery Store Tree
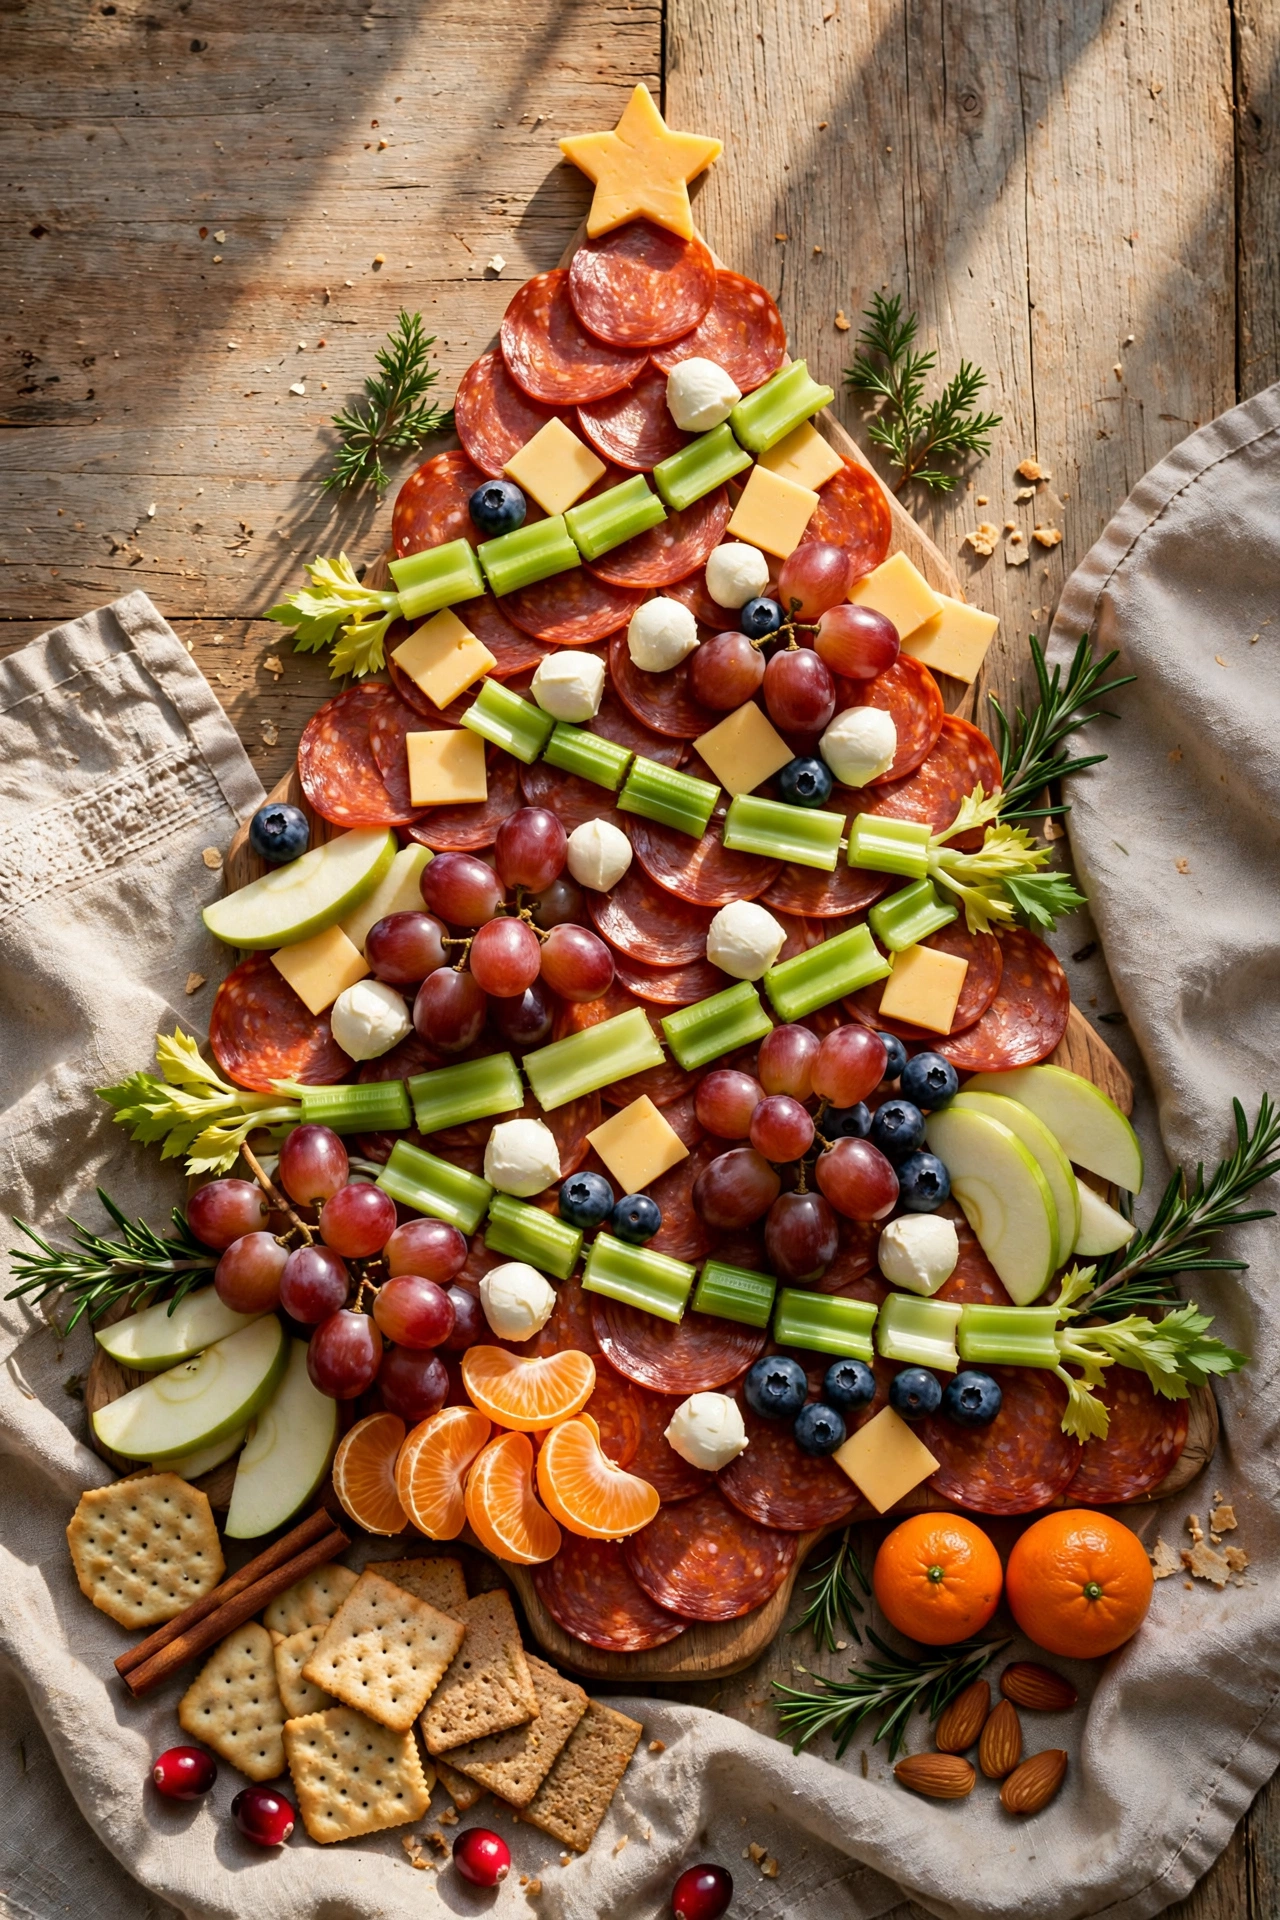
Building the entire tree from affordable, easy-to-find grocery store staples, like pepperoni instead of specialty salami, sliced cheddar and mozzarella instead of imported cheeses, and celery or cucumber instead of pricier greens, proves this concept doesn’t require a specialty cheese shop budget at all. Whatever red fruit is on sale that week, whether strawberries, apples, or grapes, works fine for the red color-blocking rows, so shopping with flexibility around sales rather than a rigid ingredient list keeps costs down significantly. Buying block cheese and slicing or cubing it at home costs noticeably less than pre-sliced specialty options and takes only a few extra minutes of prep time. Pretzel sticks or breadsticks work as an inexpensive substitute for a trunk detail at the base of the tree. This version proves a genuinely impressive-looking centerpiece is achievable on a real grocery budget rather than requiring an upscale cheese counter.
Boozy Pairing Tree
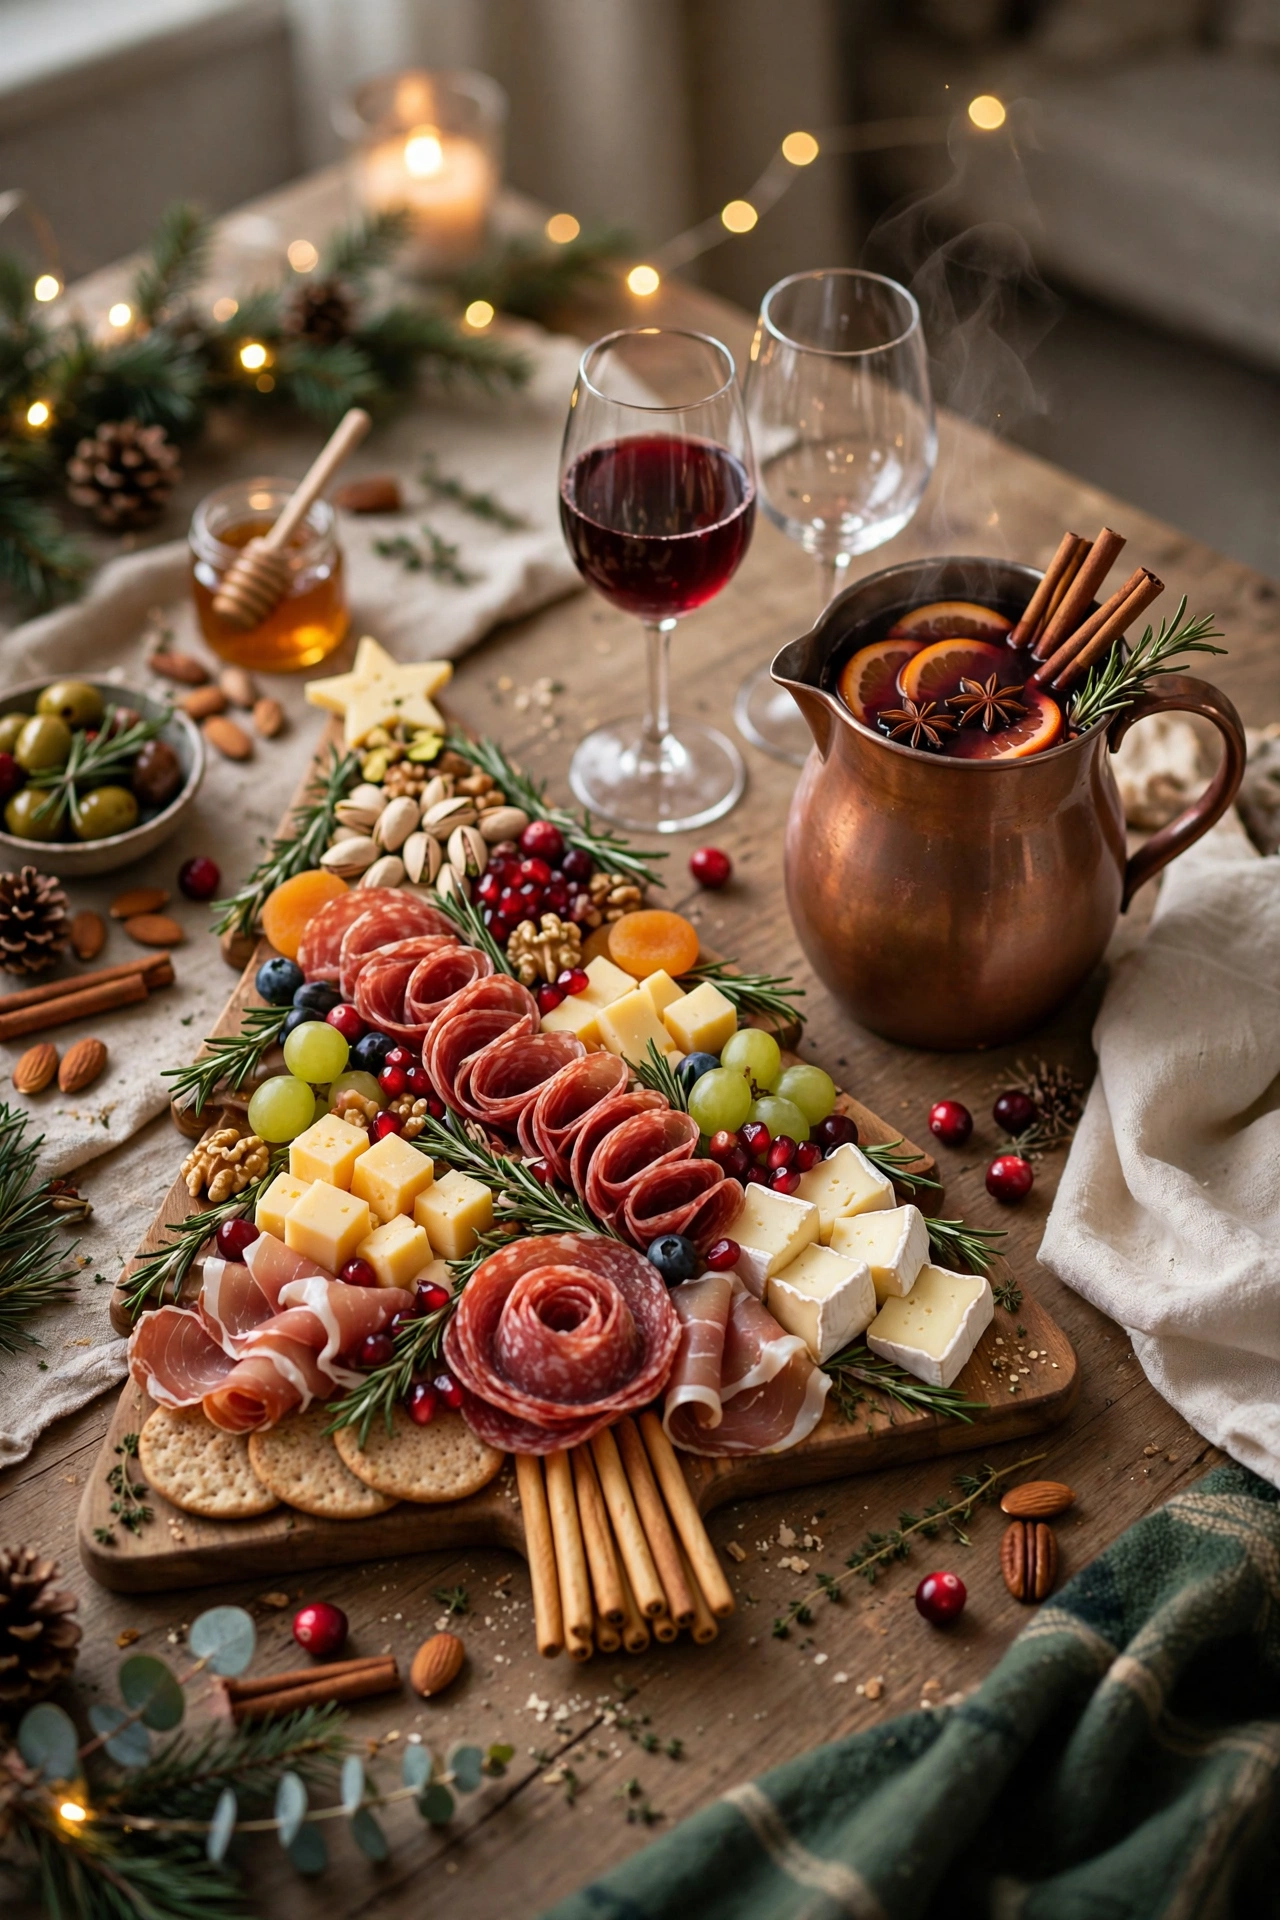
Building a small drink pairing station alongside the charcuterie tree, with a few wine or cocktail options chosen to complement the specific meats and cheeses on the board, elevates the whole appetizer spread into more of an experience than just a snack table. A dry red wine pairs naturally with cured meats and firmer cheeses, while a sparkling wine or a light white works well alongside softer cheeses and fresh fruit elements on the tree. Small cards labeling which drink pairs with which section of the tree give guests an easy, low-pressure way to try a more intentional pairing rather than just grabbing a random combination. A festive mulled wine or spiced cocktail, served warm nearby, ties into the same seasonal flavor profile as any cinnamon, cranberry, or citrus garnishes used on the tree itself. This idea works particularly well for an adult-only holiday gathering where the appetizer table doubles as a full mingling station rather than a quick pre-dinner snack.
Related: 23 Classic Christmas Tree Ideas That Never Go Out of Style
Individual Jarcuterie Mini Trees
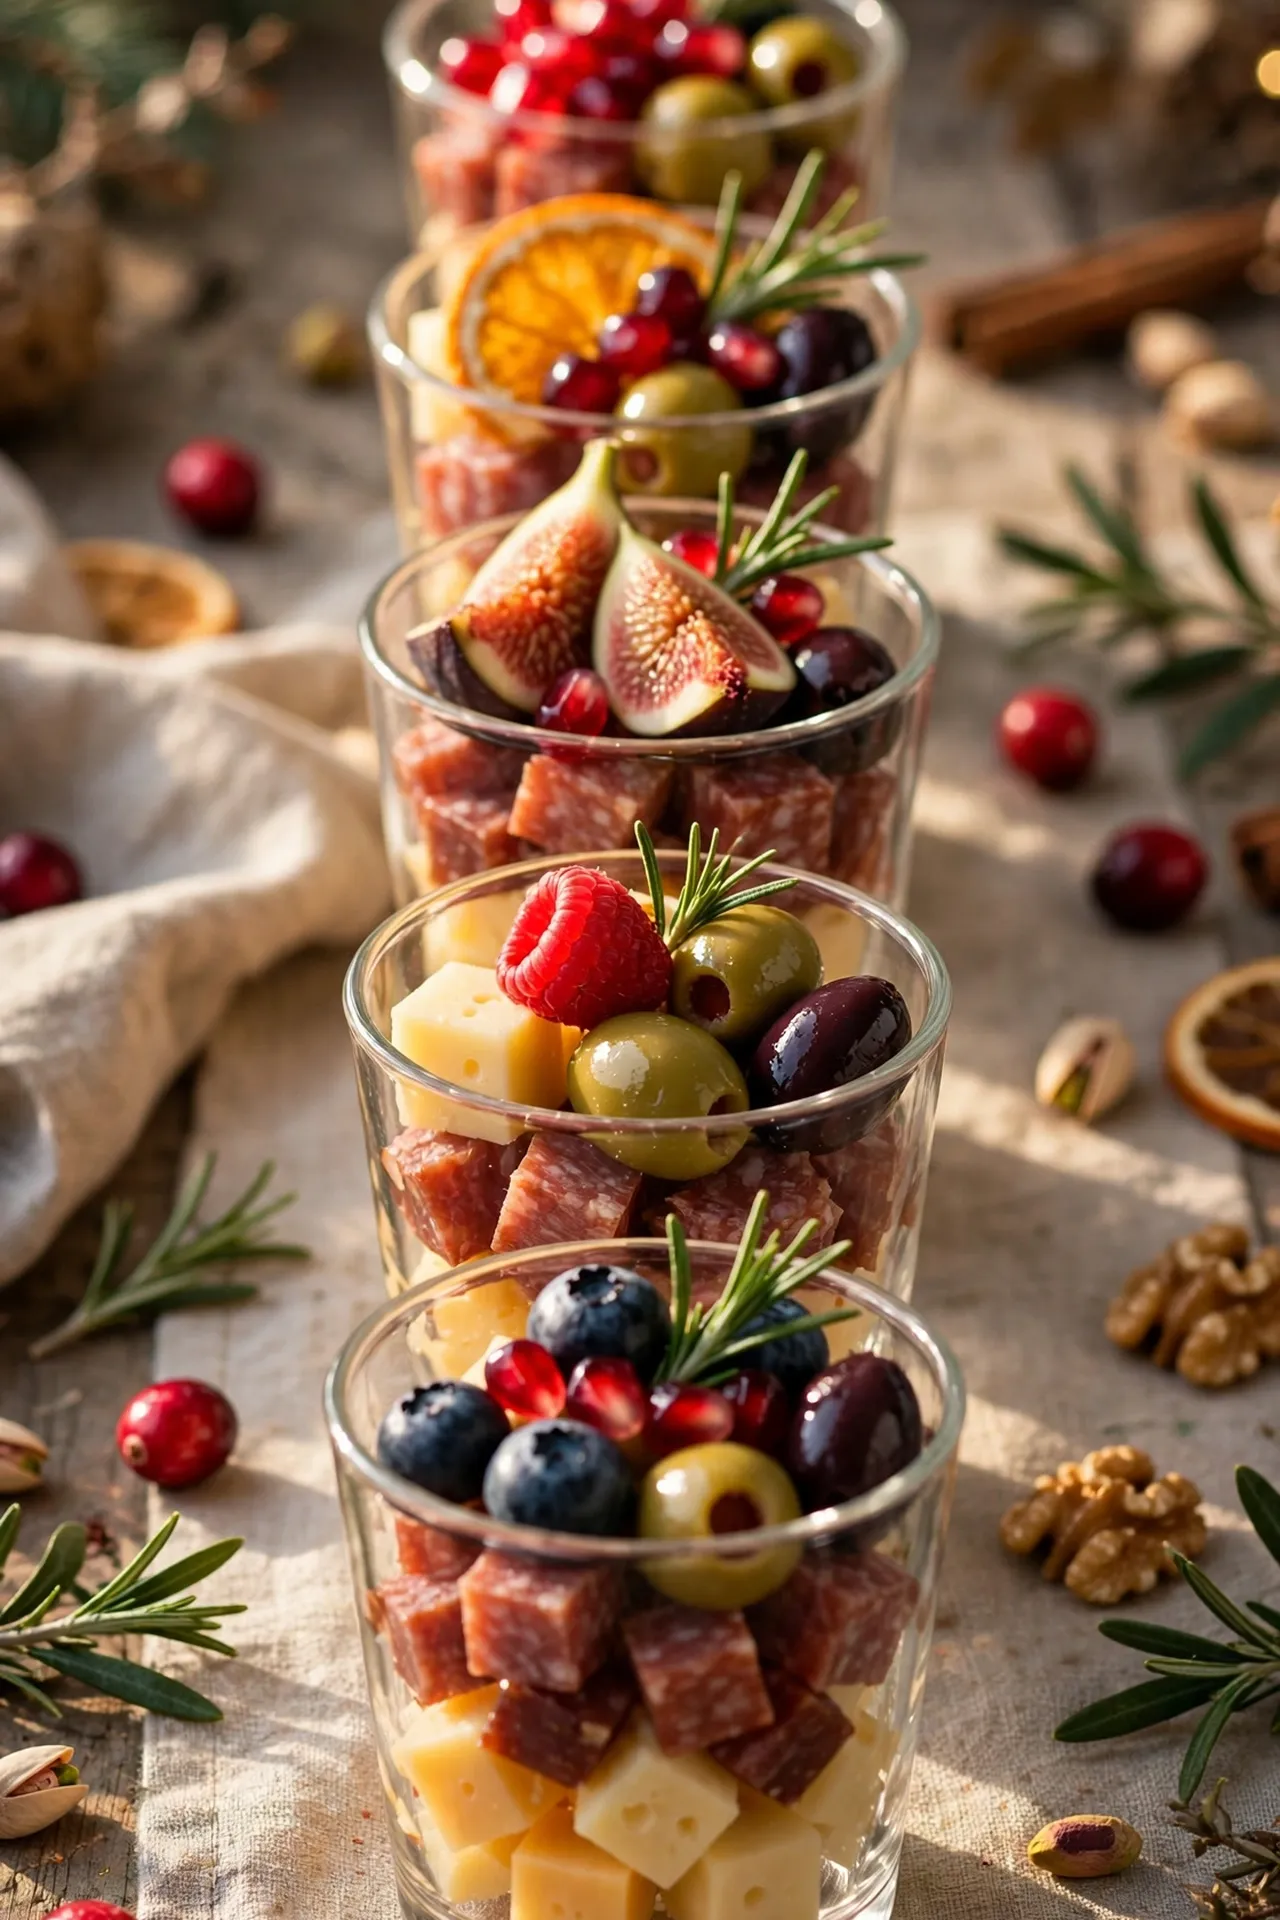
Building small individual portions in clear cups or jars, each containing a mini version of the tree’s ingredients layered vertically, solves the common problem of a shared board getting picked over unevenly or looking messy partway through a party. Layer each cup starting with a sturdier base like cubed cheese, followed by meat, olives, and a small fruit garnish on top, so each individual serving still has the same color variation as the larger board version. This format is significantly easier for guests to grab and carry around during a mingling party than trying to balance a small plate from a shared board. It also solves food safety concerns more easily, since each cup can be swapped out fresh throughout a longer party rather than leaving one large board sitting out for hours. This is a particularly strong option for a larger guest count where a single shared board would run out or get picked apart too quickly.
Red-White-Green Ombré Tree
Rather than scattering colors randomly throughout the tree shape, organizing ingredients into deliberate horizontal bands of red, then white, then green from base to tip creates a more graphic, striking visual than a mixed arrangement. Start with red items like cherry tomatoes or pomegranate seeds at the bottom third, move to white or pale items like mozzarella balls or cauliflower florets in the middle third, and finish with green olives, grapes, or herbs at the top third near the point. This banded approach photographs especially well from directly overhead, since the clear color separation reads instantly even in a quick glance at a photo. It requires slightly more advance planning around ingredient quantities than a randomly mixed tree, since each color band needs enough volume to fill its section without gaps. This technique works well for anyone who wants their charcuterie tree to stand out specifically in photos shared on social media.

Trunk & Topper Details
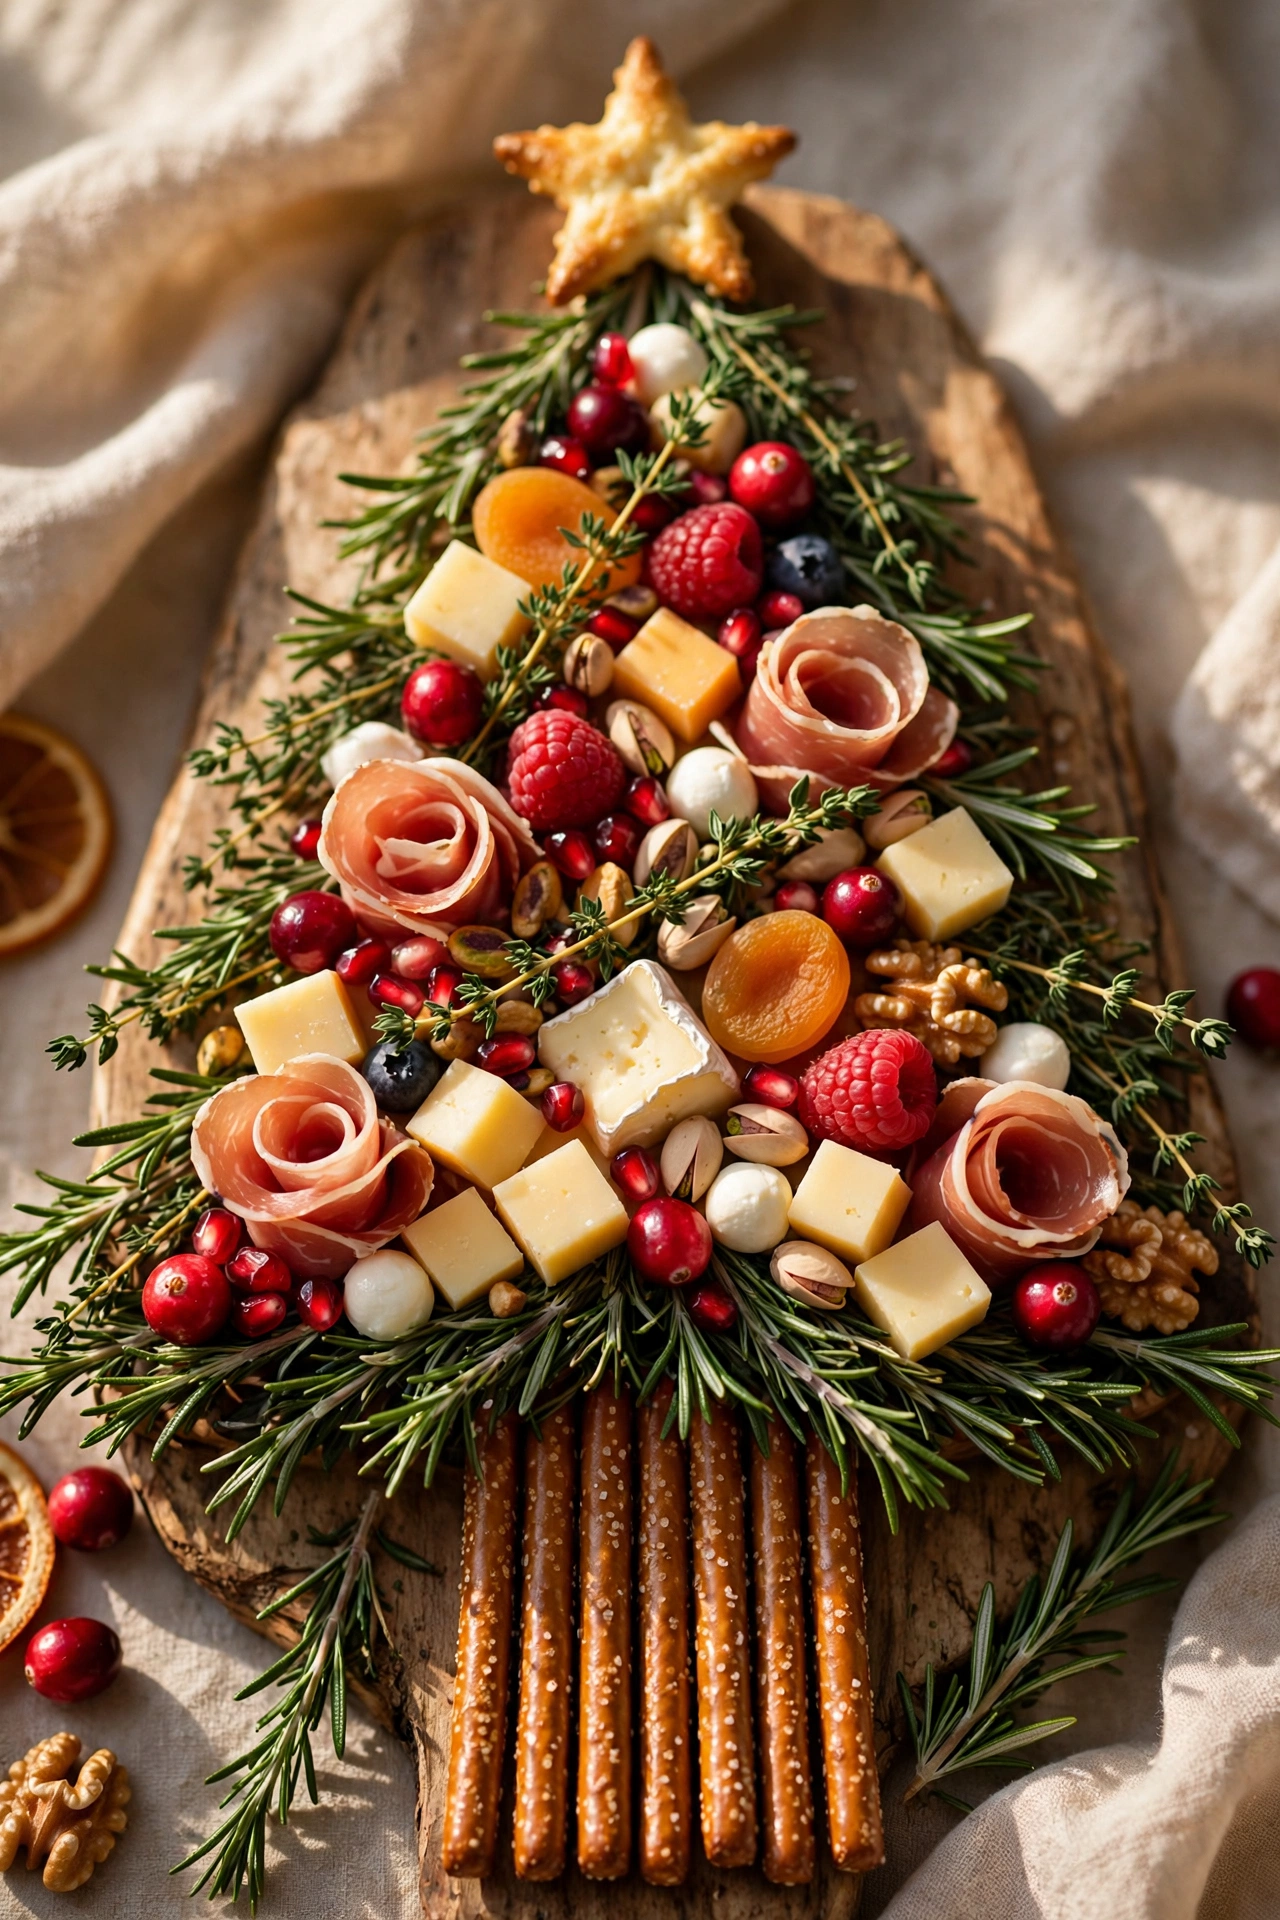
A short row of pretzel rods, breadsticks, or even a few stacked cheese logs placed directly beneath the base of the tree shape gives the whole display a visual “trunk,” completing the tree silhouette in a way that a flat-bottomed triangle alone doesn’t quite achieve. Keep the trunk section narrow, roughly a third the width of the tree’s base, so the proportions read correctly the way a real tree’s trunk is much narrower than its branches. At the opposite end, a single distinctive topper, whether the star-cut fruit idea above, a small pretzel star, or even a tiny sprig of a different herb, gives the eye a clear finishing point at the peak. These two small details, trunk and topper, take only a couple of minutes to add but are frequently the difference between a charcuterie board that vaguely resembles a triangle and one that unmistakably reads as a Christmas tree from across a room.
Butcher Paper No-Board Method
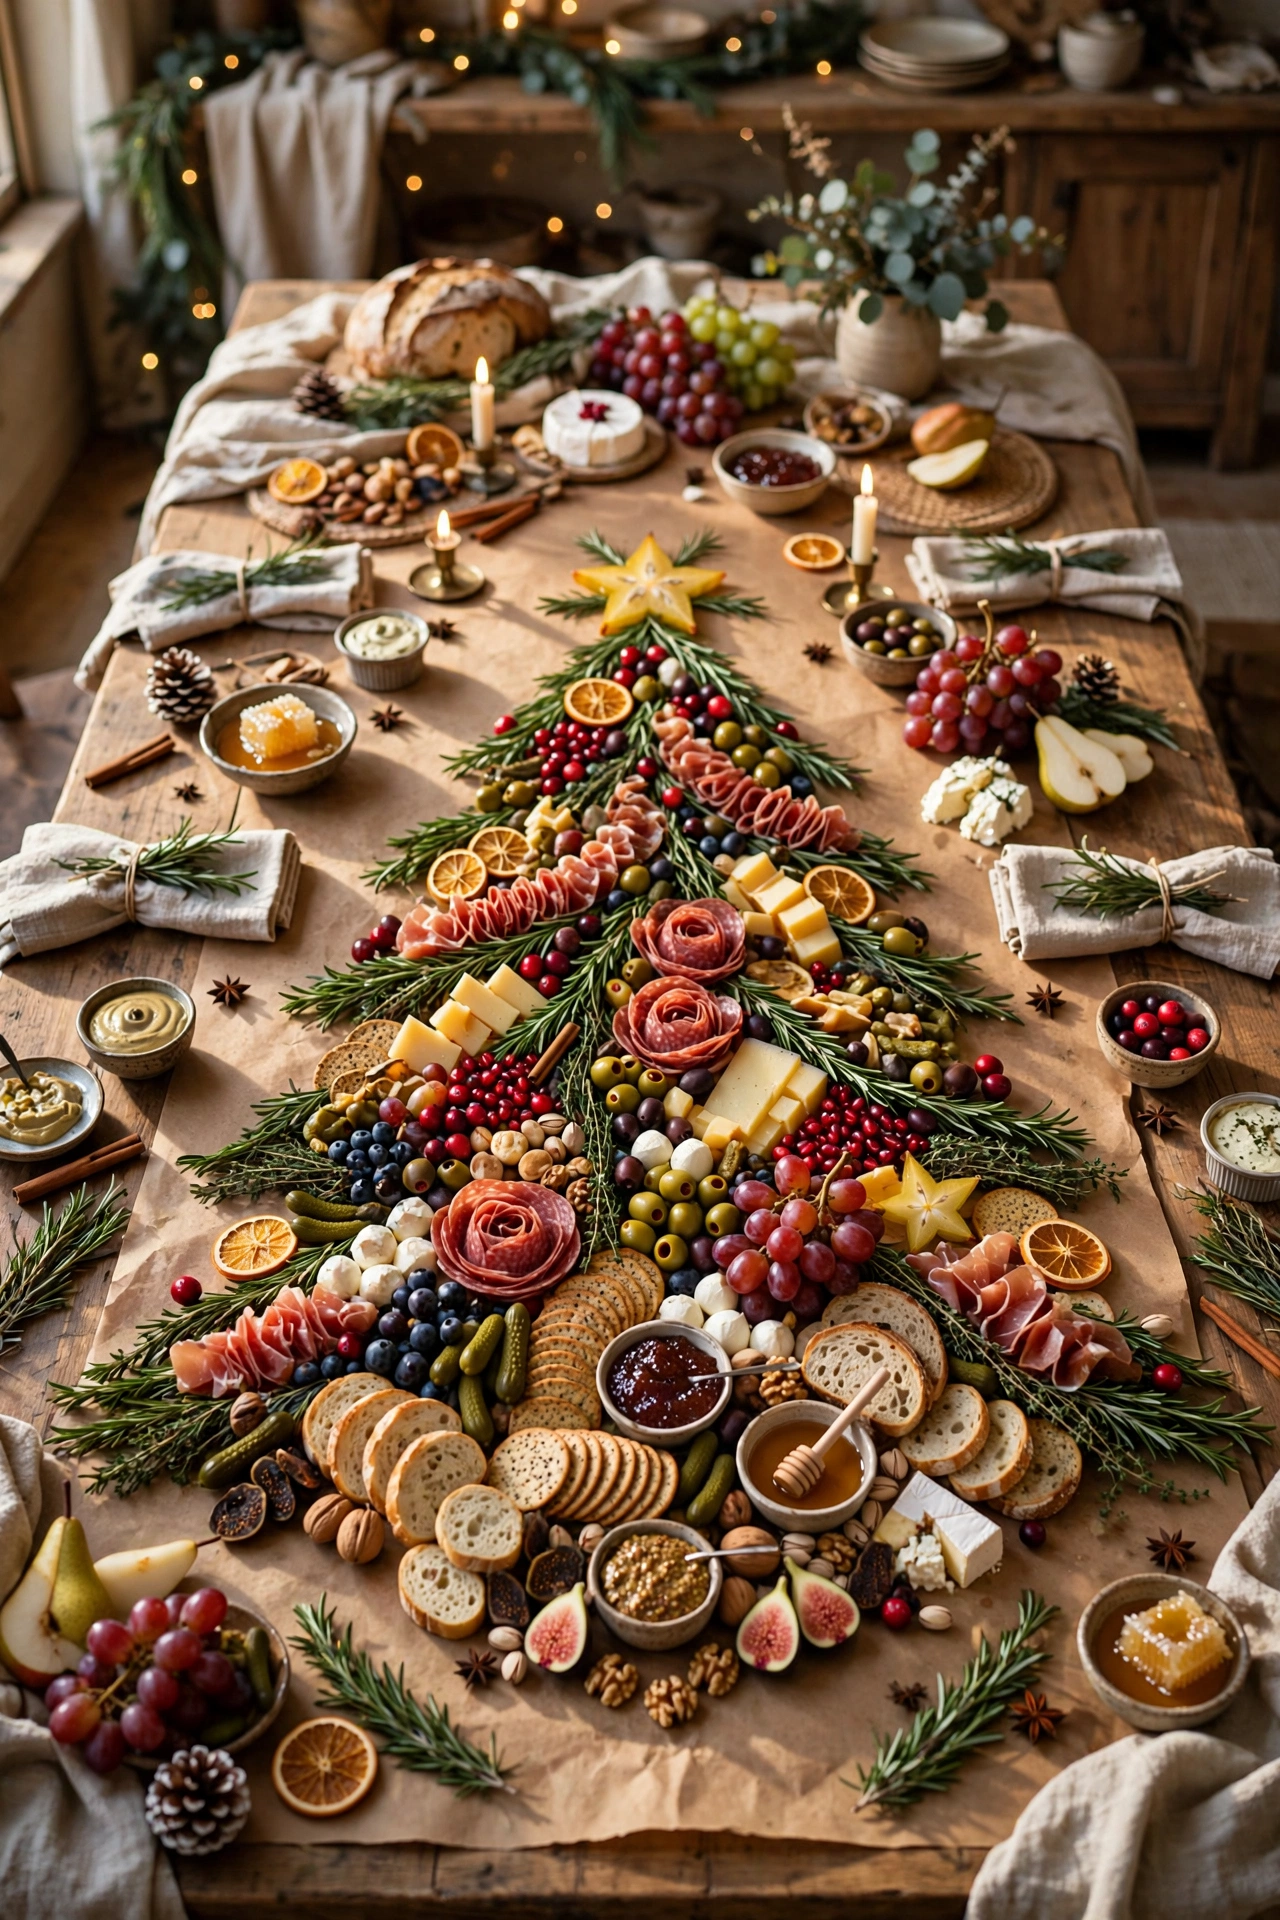
For a genuinely large party where no single board is big enough, laying down a sheet of butcher paper directly on the table and building the tree shape right on top of it skips the need for a specialty board entirely and makes cleanup dramatically easier afterward. This method also allows the tree to scale to essentially any size, since the paper can be cut to match the table itself rather than being limited to a fixed board dimension. Roll or fold the used paper directly into the trash once the party winds down, rather than having to wash and dry a large board, which matters more than it sounds like at the end of a long holiday gathering. A few pieces of washi tape or decorative tape along the paper’s edges can dress up the presentation slightly if the raw kraft paper look feels too plain on its own. This is one of the more practical, budget-friendly techniques on this entire list for anyone hosting a genuinely large crowd.
Make-Ahead Layered Prep
Assembling the entire tree up to about four hours before serving, then covering it tightly with plastic wrap and refrigerating until guests arrive, lets the host actually enjoy the party instead of assembling appetizers while people are already mingling. Add any ingredients that soften or wilt quickly, like nuts or delicate herb garnishes, right before serving rather than during the initial assembly, since these are the elements most likely to look tired after sitting for several hours. Pre-cutting and portioning cheeses the day before, then storing them separately in the refrigerator until final assembly, saves significant time on the day of the party itself. This approach also solves the common problem of a board looking perfect at the start of a party and increasingly picked-over as the evening goes on, since a host who prepped ahead has more bandwidth to casually refresh and rearrange the board partway through.

Sweet & Savory Half-and-Half Tree
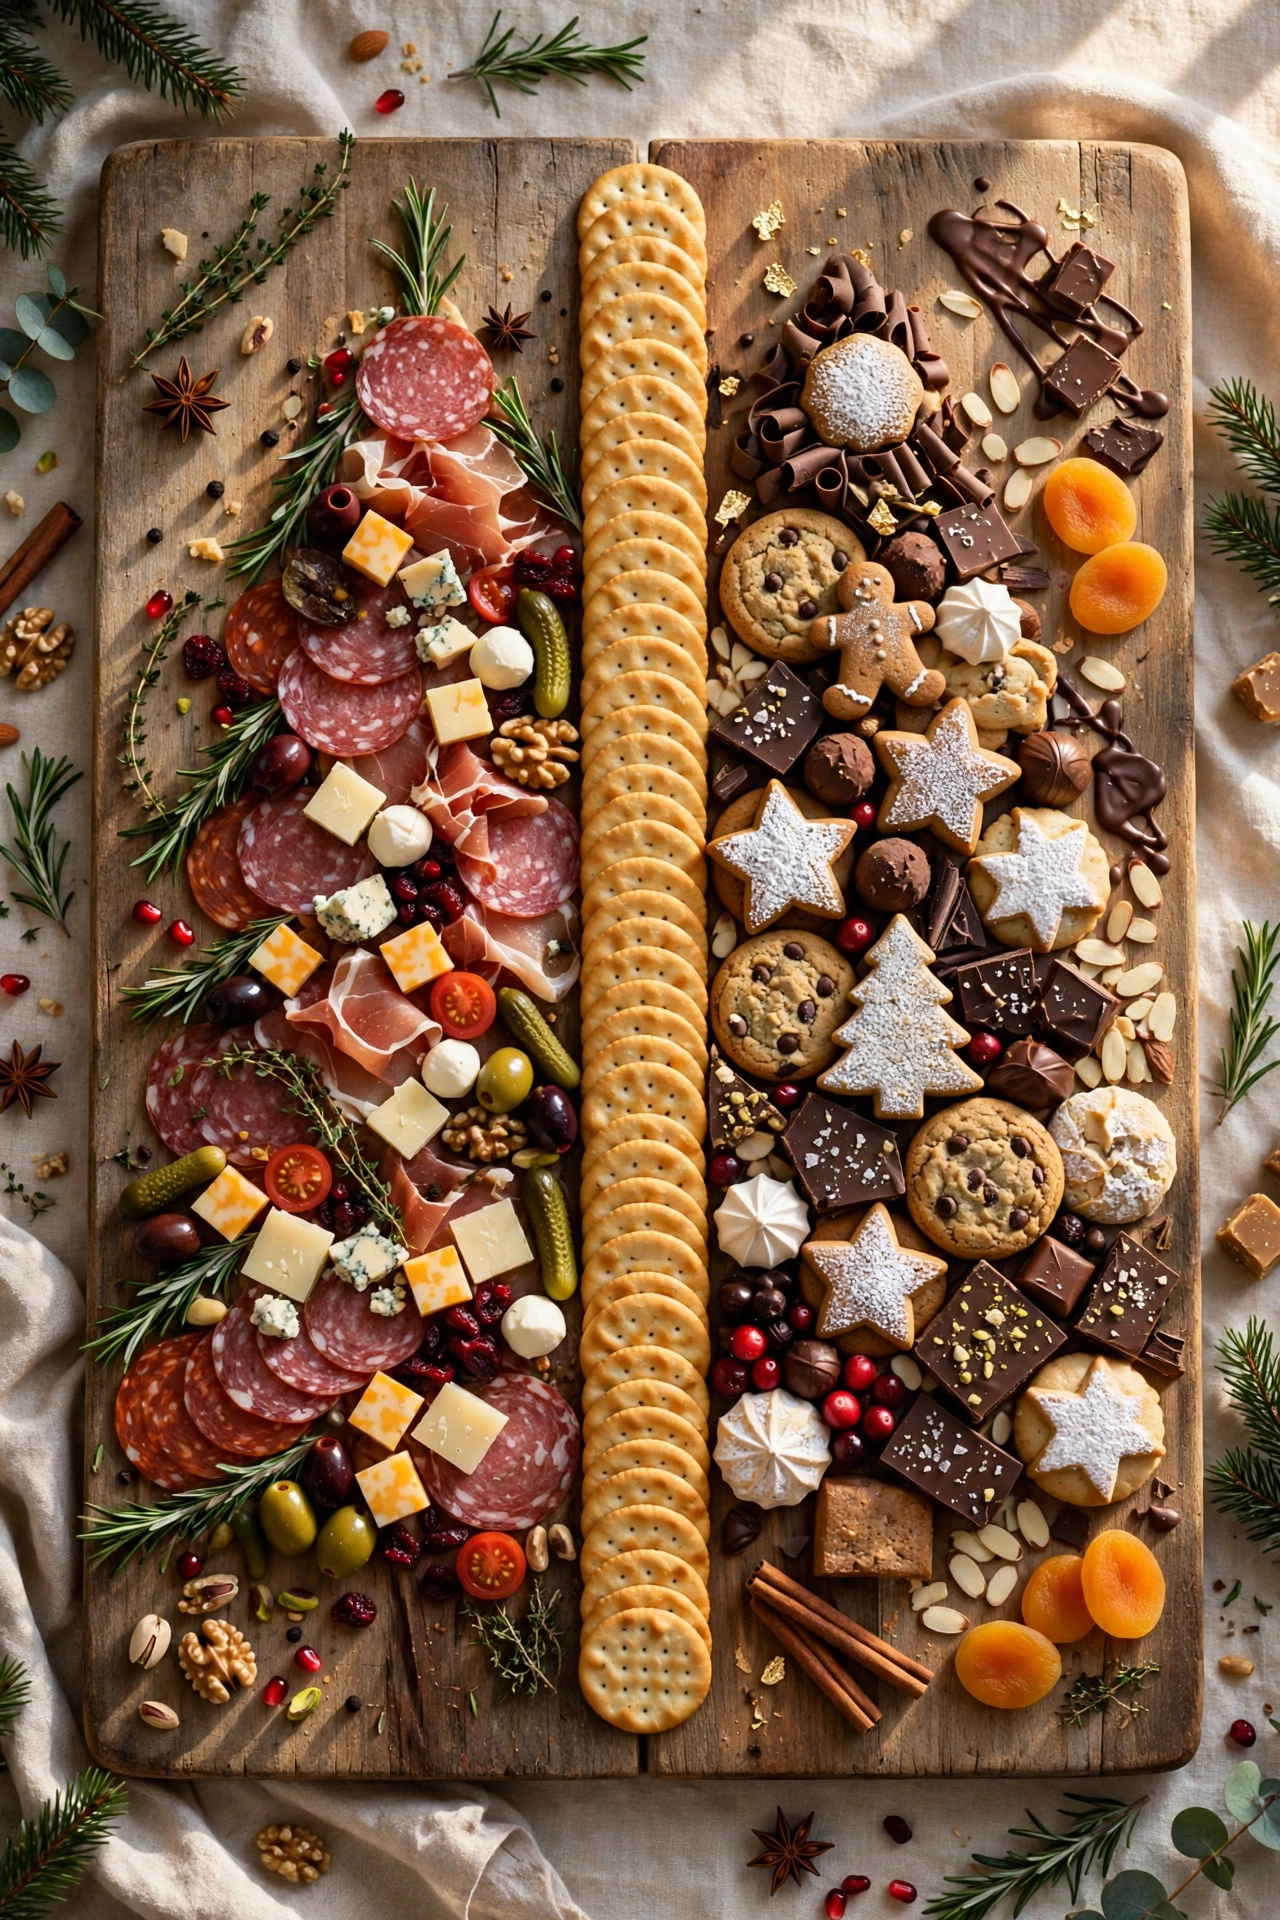
Splitting a single large board into two distinct halves, one built from classic savory charcuterie ingredients and the other from dessert items, lets one board serve double duty at a party without needing two entirely separate setups. A clear dividing element, like a row of crackers or a strip of parchment down the center, helps keep the two halves visually and practically distinct so flavors don’t awkwardly mix together on the same section of board. This works particularly well for smaller gatherings where preparing two full separate boards would create more food than the group could realistically finish. Guests naturally gravitate to whichever half matches their preference in the moment, whether that’s a pre-dinner savory bite or an after-dinner sweet craving, all from the same table setup. This is a smart space-saving option for anyone with limited table or counter space for a full spread of separate appetizer and dessert stations.
Veggie-Only Healthy Tree
Building the tree entirely from fresh vegetables, like broccoli florets for texture at the base, sliced cucumbers and bell peppers arranged in rows, and cherry tomatoes for color, creates a lighter, fresher option that balances out a table full of richer appetizers at a typical holiday spread. A small bowl of ranch, hummus, or a yogurt-based dip tucked at the base gives guests something to pair with the vegetables without needing to add cheese or meat to lighten the overall board. Broccoli florets in particular work well toward the top of the tree shape, since their natural texture already resembles small pine branches once arranged in a cluster. This version is a thoughtful addition for a party with health-conscious guests, older relatives watching richer foods, or simply as a lighter counterpoint on a table that otherwise leans heavy on cheese and cured meat. It also tends to be one of the more affordable versions on this list, since vegetables are generally less expensive per serving than specialty meats and cheeses.

Party-Size Multi-Tree Grazing Table
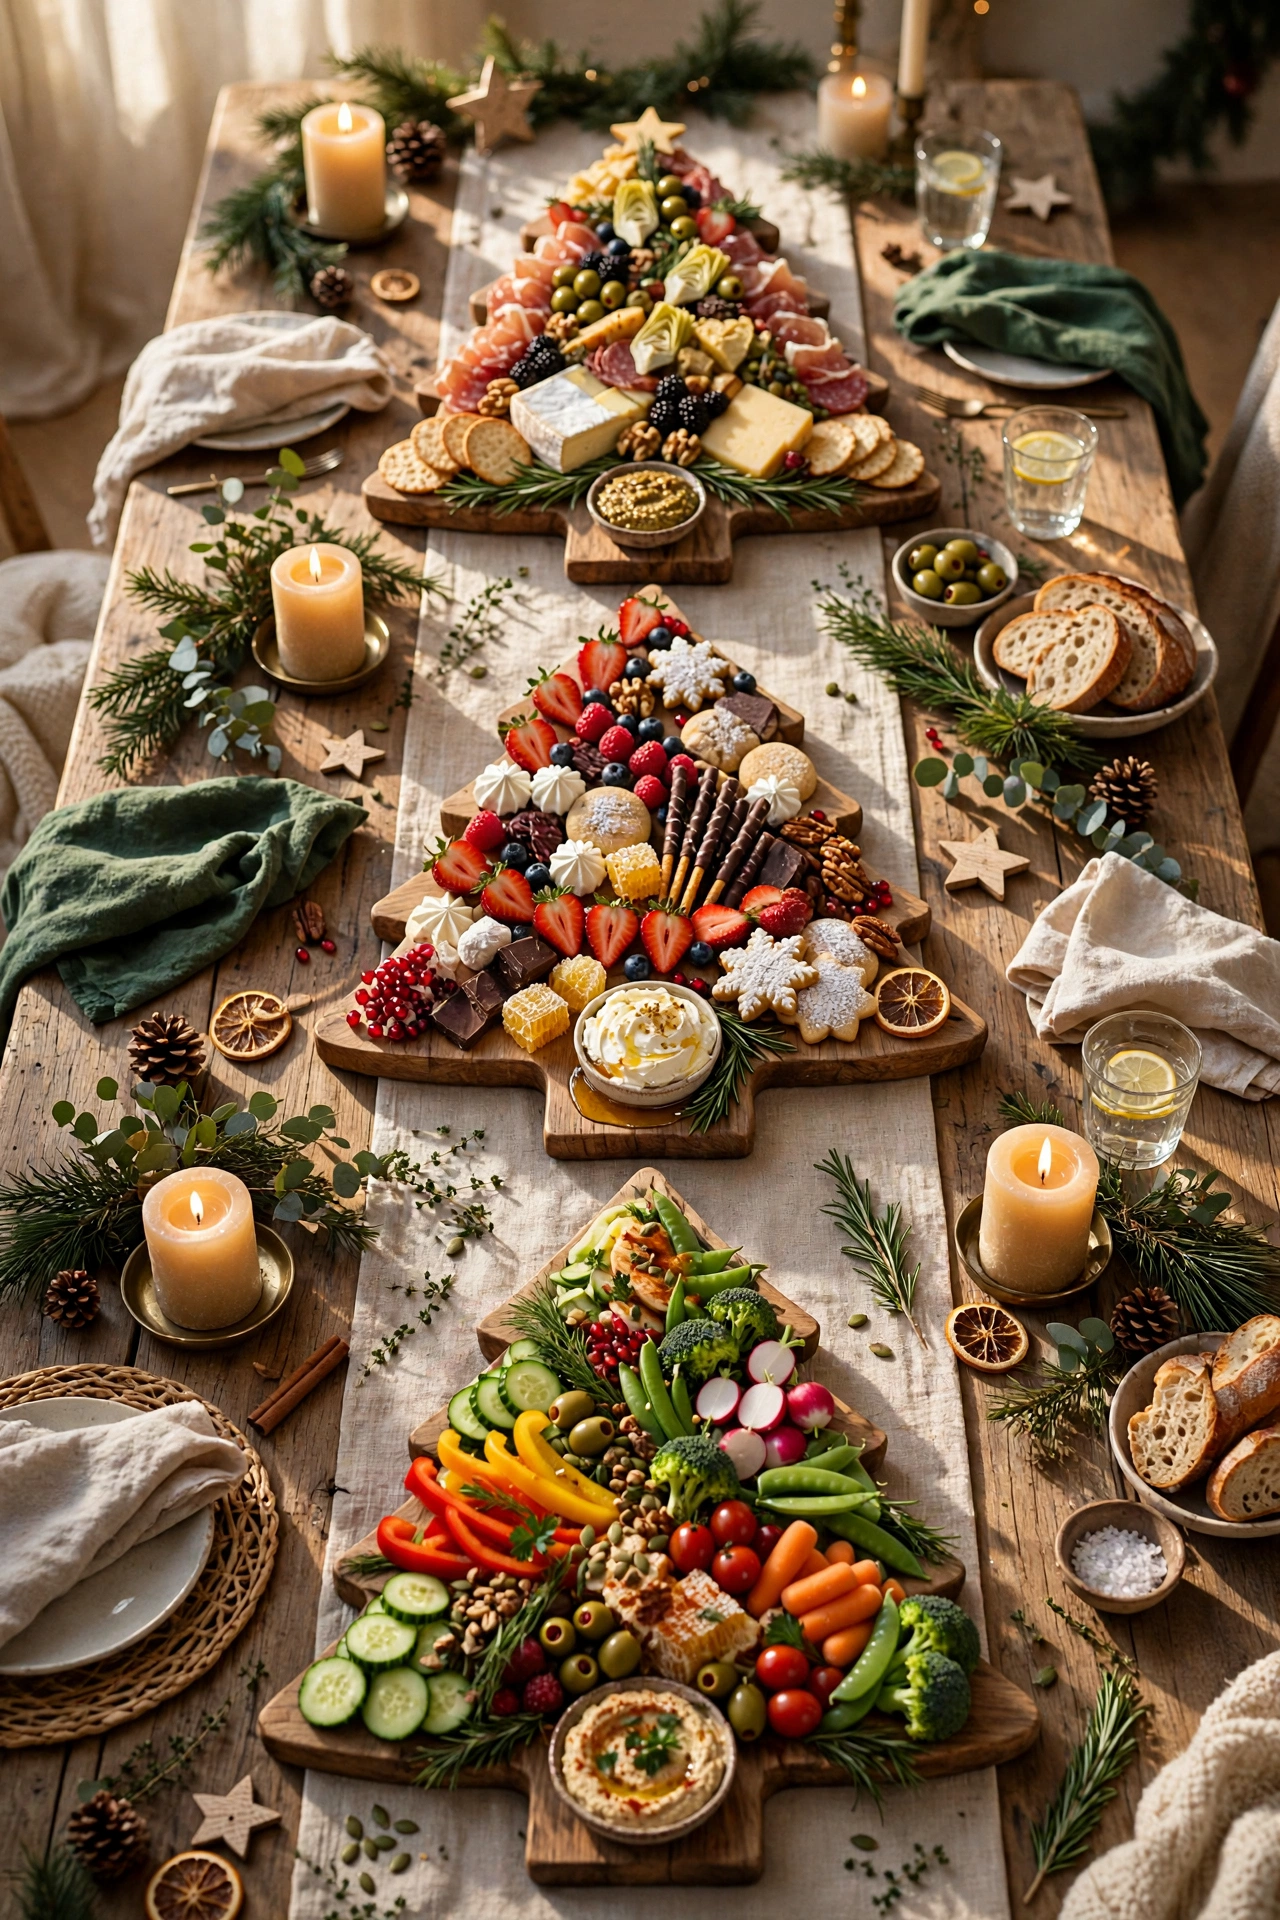
For a genuinely large party, building two or three smaller charcuterie trees spread across the table rather than one enormous board keeps every guest within easy reach of a full tree, rather than crowding around a single centerpiece in the middle of a long table. Space the smaller trees evenly apart with room for plates and napkins between them, and vary the theme slightly across each one, such as one classic savory tree, one dessert tree, and one vegetable tree, so guests aren’t just seeing three identical repeats of the same board. This layout also solves a practical serving problem at a big gathering, since a single massive tree tends to get picked apart unevenly from whichever side people are standing closest to, leaving awkward gaps rather than a gradually and evenly diminishing spread. Plan on roughly one small to medium tree for every eight to ten guests as a general starting quantity guideline, then adjust based on what else is being served at the party. This approach turns a single appetizer idea into a full grazing table experience for a larger holiday gathering.
Related: 15 Black and Pink Christmas Tree Ideas for a Bold Look
Styling Tips
- Work from the base up in slightly narrowing rows to get a clean triangle silhouette, rather than filling in randomly and adjusting afterward.
- Alternate colors row by row rather than scattering them, since this is what makes the tree shape actually read clearly from across a room.
- Fill every visible gap with something small (nuts, berries, herb sprigs) rather than leaving bare board space showing through.
- Add a trunk and a topper detail; these two small additions are what separate a vague triangle from an unmistakable Christmas tree.
Practical Implementation Ideas
- Pre-cut and portion sturdier ingredients like cheese and meat the day before, storing them separately until final assembly.
- Assemble the full tree up to about four hours ahead, adding delicate garnishes like herbs and nuts right before serving.
- Choose the flat layout over a standing foam cone for any board guests will actually be eating from throughout the party, reserving the cone method for a display piece.
Common Mistakes to Avoid
- Leaving a fully assembled board out for more than two hours at room temperature, which is a genuine food safety concern, especially with meat and dairy at a longer holiday party.
- Scattering colors randomly instead of banding or alternating them, which makes the tree shape harder to recognize at a glance.
- Building only one large board for a big party instead of spreading several smaller ones across the table, leading to uneven picking and awkward gaps.
- Skipping the trunk and topper details, which are small but do a lot of work in selling the overall tree shape.
Small-Space Alternatives
A single small board or even a large plate works fine for a scaled-down version of this concept for a small gathering, using the same narrowing-triangle technique at a much smaller size. The jarcuterie individual cup method is also a strong small-space option, since it needs no large flat surface at all and can be prepped directly in the refrigerator until serving time.
Budget-Friendly Alternatives
Building from whatever fruit is on sale that week, using pepperoni instead of specialty salami, and slicing block cheese at home instead of buying pre-sliced options all keep costs down without sacrificing the visual impact of the finished tree. Butcher paper in place of a specialty board is both cheaper and easier to clean up than an expensive wooden serving piece.
Pro Styling Recommendations
Treat the tree the way a florist treats an arrangement: establish the structural shape first with your sturdiest ingredients, then fill in color and texture, and finish with the smallest, most delicate details last. Prep as much as reasonably possible ahead of time so the day of the party is about hosting, not assembling, and always plan a slightly larger quantity than feels necessary, since a well-built charcuterie tree tends to disappear faster than hosts expect.
FAQs
Generally no more than two hours at room temperature, per standard food safety guidance, which matters more at a holiday party that often runs longer than that.
A flat layout is more practical for actual serving, since guests can pull pieces from anywhere without disturbing the whole display, while a standing cone works better as a display piece than something meant to be eaten from directly.
As a rough starting point, plan for two to three ounces each of meat and cheese per guest if the board is served as an appetizer before a full meal, adjusting upward if it’s meant to be the primary food offered.
Yes, most versions can be fully assembled up to about four hours ahead and refrigerated under plastic wrap, with delicate garnishes like nuts and fresh herbs added just before serving.
Marinated vegetables, hummus, plant-based cheese alternatives, and a wide range of fresh and dried fruit all work well as substantial substitutes for traditional cheese and meat.
Breadsticks, cheese logs, or even a few stacked cucumber spears all work as a narrow, sturdy trunk detail beneath the base of the tree shape.
A rough guideline is one small to medium tree for every eight to ten guests, adjusted based on what else is being served alongside it.
Butcher paper laid directly on the table scales to any size and skips the need for a specialty board entirely, plus it makes cleanup considerably easier afterward.
Conclusion
A Christmas tree charcuterie board is a genuinely simple concept once the real technique behind it is clear: build the shape from the base up, alternate or band your colors deliberately, fill every gap, and finish with a trunk and topper. From there, the same structure adapts easily to whatever the party actually needs, whether that’s a full savory spread, a dessert table, a breakfast board, or several smaller trees scaled for a bigger crowd.